Pages

Sunday 25 June 2023

Emily's Mini Birthday Release | Stamping Bella

Today would have been Emily, our BELLA IN CHIEF's birthday. It's still hard to think about Em without that knot forming at the back of my throat. She is missed as much today as the day we lost her. 

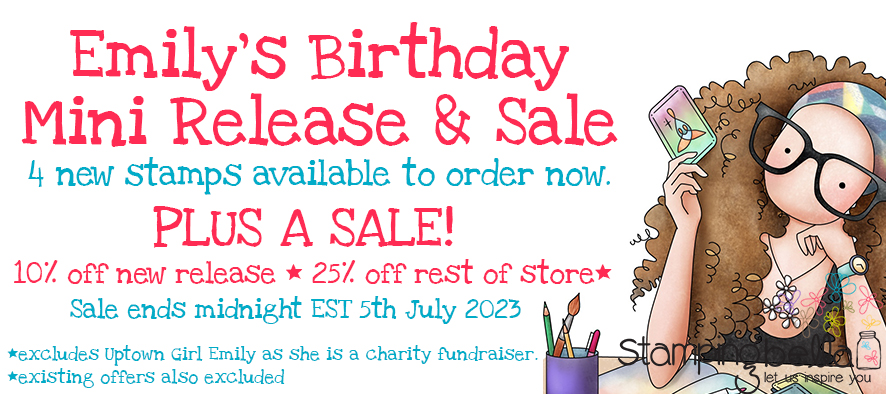
To honour Emily on her birthday, we have an extra special mini release - and it is OUTSTANDING!. All of the stamps are available right now in the WHAT’S NEW section on the store. And, in keeping with tradition, we also have Em's birthday sale. 


My first card today features Uptown Girl Emily Da Bella and Emily's Sentiment Set
Uptown Girl Emily Da Bella is excluded from the sale as she is a charity fundraiser. All of the profits from sales of this stamp will be donated to the Emily Block Memorial Fund, which supports children’s art therapy programs.


I couldn't just do one card with these 2 stamp sets. Emily was so proud of the SISTAHOOD she created and having a all of her "isms" in one stamp set is absolutely AMAZING. They are just so PERFECT!. 


My last card features Emily's favourite flower - Lily of the Valley. Bundle Girl with Lily of the Valley marries Emily's favourite flower and my favourite stamp line together. Isn't she just the CUTEST? 


Check out the rest of the Design Team and Guest Designers samples on Emily's birthday post, over on the Stamping Bella blog. LET ME TELL YOU... THEY ARE OUTSTANDING!

For more inspiration check out the Stamping Bella Sisterhood page over on Facebook, where you can add your own Stamping Bella creations.

Where you can find me


Thursday 15 June 2023

Father's Day Pop-Up Card | Stamping Bella

Hi all :) Today I'm sharing a Pop-up Card with Gift Card Pocket tutorial featuring Gnome Carpenter. With Father's Day looming it was a perfect choice of card to make. 


Supplies:
Celebrate word die (retired)
Scoring board and bone folder
Pencil/eraser/white gel pen

Black card:
(1x) 5" x 10"
(1x) 2" x 4.75"
(1x) 2-7/8" x 4"
(1x) 4" x 2"

White card:
(4x) 4.75" x 4.75"
(1x) 2.75" x 3-7/8"

Designer paper:
(4x) 4.5" x 4.5"
(1x) 2.5" x 4.5"

How to:
Score the 5" x 10" piece of black card at 5" on the long side. Fold and burnish well to create the card base. Adhere the 4.5" x 4.5" pieces of designer paper to the 4.75" x 4.75" pieces of white card and then adhere these panels to the inside and outside of the card base. 


Draw a lines on the 2" x 4.75" piece of card, on the long side, at 3/8", 3/4", 1-3/8", 2-3/8", 3-3/8", 4", and 4-3/8". Draw a line on the short side at 1"


On the 5/8" sections draw a line, diagonally, as shown below. Cut along the diagonal line and then cut along the 1" line to each edge, removing the pieces of card entirely. 


Score diagonally across the four centre 1" squares, and score along the 1" line. Fold all the score lines and crease well. Score on the 3/8" line on each end of the piece and fold upwards. 


Pinch up the 1" scoreline and push inwards to create the pop mechanism. 


Fold the 4" x 2" piece of card in half to make a 2" square. 


Apply adhesive to the outside of one of the 3/8" sections and adhere to the inside of the open end of the 2" square. 


Flip the piece over and repeat on the other side.


Open up the card base and place a pencil/white mark at the 2.5" point across the fold 


Line up the point on the pop mechanism with the 2.5" pencil mark. Apply adhesive to one side of the triangle and fold the card over it. 


Flip the card over, again apply adhesive to the right half of the pop mechanism and fold the card closed again. 


Make the inside panel from the remaining black and white card pieces. 


With the card in the upright position, and fully open, apply adhesive to front of the pop mechanism, up to the crease line. 


Adhere the pop panel to it. 


Fold the card closed to ensure the pop panel can't be seen when the card is closed. 


Adhere any remaining 4.5" squares of paper to the card base. 


Stamp Gnome Carpenter  onto white card and colour using  your preferred medium. Cut out using a stitched rectangle die, or just trim to size using a paper trimmer. 


Adhere the image to the pop up mechanism. 


Decorate the inside of the card with a sentiment. 


Apply adhesive to both short sides and the bottom long side of the remaining piece of designer paper. Adhere to the back of the card to make a pocket for a gift card, sentiment card, or tags. 


For more inspiration check out the Stamping Bella Sisterhood page over on Facebook, where you can add your own Stamping Bella creations.

Where you can find me


Thursday 8 June 2023

Hula Gnome Beach Care Pack | Stamping Bella

Hi!! I'm back with another step-by-step and today I am sharing how I made this Hula Gnome Beach Care Pack. It's a fun little gift filled with all sorts of practical items such as sunscreen, lip balm, tissues, etc. 


Supplies:
White card
Nautical/beach themed papers
Scoring board and bone folder
Adhesive
Stitched circle dies
In the box: 
Sunscreen, after-sun lotion, lip balm, gauze, Band-Aids. 

How to:
Stamp Hula Gnome onto white card, colour with your preferred medium, then fussy cut around the outline. 
Set aside. 


Cut white card:
(1x) 6-1/16" x 6-9/16" - Lid
(1x) 7" x 7.5" - Base
Lid:
(1x) 4-3/8" x 3-7/8"
(1x) 4-3/8" x 7/8"
(2x) 3-7/8" x 7/8"

Cut paper:
Lid:
(1x) 4.25" x 3.75"
(1x) 4.25" x 0.75"
(2x) 3.75" x 0.75"
Base:
(2x) 1-3/8" x 4-3/8"
(2x) 1-3/8" x 3-7/8"
Inside:
(1x) 4-3/8" x 7/8"
(2x) 3-7/8" x 7/8"

How to:
Score the 7" x 7.5" piece of white card at 1.5" on all four sides. 


Cut on the four outer score lines, up to the intersecting lines, as shown below. Tape in the edges to make tabs. 


Fold and burnish all the score lines. 


Apply adhesive to each of the four tabs and adhere them to the inside of the adjacent side to make the box base. 


Score the 6-1/16" x 6-9/16" piece of card at 1" on all four sides. 


Cut away two of the corner sections on the long side, then make tabs from the remaining corner sections as shown below. Taper the edges of the long tab at the back, and the small tabs at the front. 


Adhere the small tabs to the inside of the adjacent sides. 


Apply adhesive to the outside of the long tab and adhere to the inside back of the box base - lining the 1" score line with the top of the base. 


Close down the lid to ensure it fits well. 


Adhere the paper pieces to the card pieces for the box lid. Adhere the panels to the lid, then adhere the paper panels to the outside of the base. 


Cut a 3.5" stitched circle from white card, and a 3.5" stitched circle from paper. Adhere them together and then adhere the circle panel to the top of the box. 


Adhere the inside paper panels, then fill the box with the sunscreen, after-sun lotion, lip balm, gauze, and band-aids. 


Stamp the Aloha! sentiment onto a small strip of paper and adhere to the front of the lid. Decorate the box with die cuts and/or stickers then adhere the Hula Gnome into the centre of the circle panel using foam tape/dots. 


For more inspiration check out the Stamping Bella Sisterhood page over on Facebook, where you can add your own Stamping Bella creations.

Where you can find me