Pages

Thursday 26 January 2023

Milk Carton Surprise Gift Box | Stamping Bella Stamps

Hi! I'm back with another tutorial and today I'm sharing my take on this Milk Carton Surprise Gift Box, featuring the boy character from Uptown Cowboy Kids. This fun project is a surprise within a surprise and you can even add a gift card. 


Supplies:
White card
Designer paper
Scoring board and bone folder
Ruler
Stitched Circle Dies
Enamel dots

How to:
Cut card and paper: 
Milk Carton - 
White card - 7-9/16" x 7-9/16" (base)
Designer paper - 5.5" x 11" (lid). (4x) 2-3/8" x 2-3/8" (base panels)

Inner Box - 
White card - 9.5" x 8.25"
Designer paper - (4x) 2-1/8" x 3-7/8". (1x) 2-1/8" x 2-1/8"

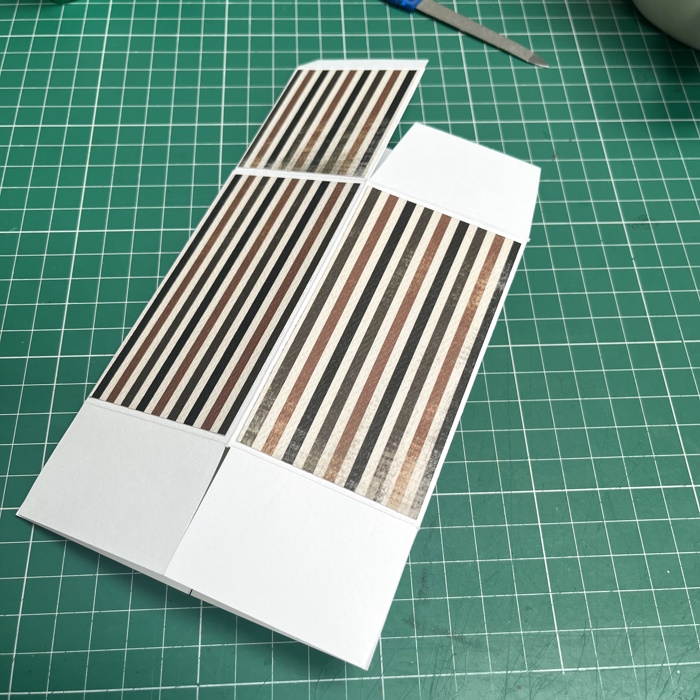
Score the 5.5" x 11" piece of paper at 2-5/8", 5.25", 7-7/8" and 10.5" on the long side. Flip 90 degrees and score at 5/8" and 2.5" 


Score the 7-9/16" x 7-9/16" piece of card at 2.5" on all four sides. 


Score the 9.5" x 8.25" piece of card at 2.25", 4.5", 6.75" and 9" on the 9.5" side. Flip 90 degrees and score at 0.5", 2.75" and 6.75"


Cut the inner box as shown below. 


Cut the milk carton base as shown below. 


Take the milk carton top and, in the 2-5/8" section beside the 0.5" section, make a notch at the centre point on the 5/8" horizontal score line. Score a line diagonally from the centre point down to the left and right corners of the 2.5" score line. 


Fold up the diagonal score lines. Repeat this on the third 2-3/8" section from the 0.5" section. 


Apply adhesive to the 0.5" section and fold into the middle. Fold over the other end and adhere to the adhesive. 


Pinch in the diagonal score lines and apply adhesive to the 5/8" section, as shown. Repeat on the other side of the carton. 


Take the box base piece of card and adhere the small tabs inside to create the box shape. 


Adhere the paper panels. 


Slide the milk carton lid over the box to ensure it fits. 


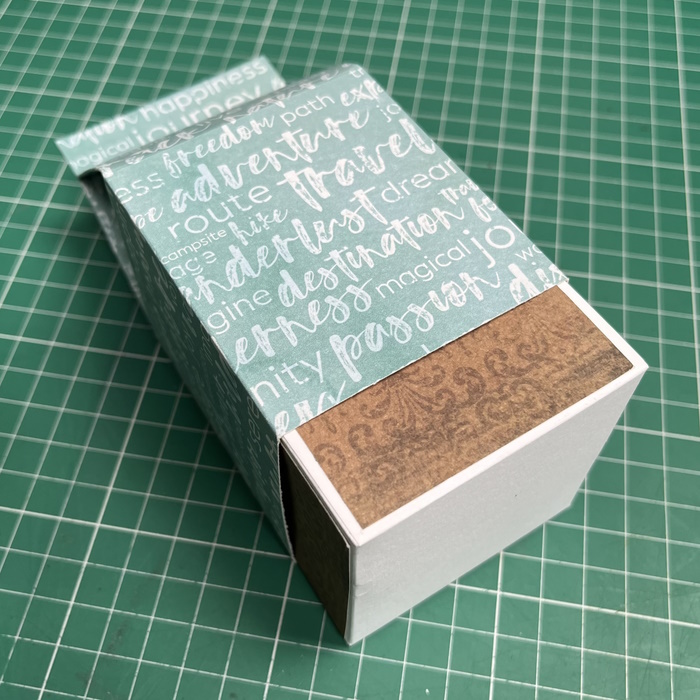
Take the internal box piece of card, apply  adhesive to the 0.5" tab. Fold the opposite end of the card over and adhere to the 0.5" section. 


Adhere the paper panels to the sides and the lid


Fold in the bottom tabs, applying adhesive to the last one. 


Close the top of the box. 


Place the inner box into the milk carton base and put the lid on. The inner box holds the lid so that the lid doesn't fully cover the base. 


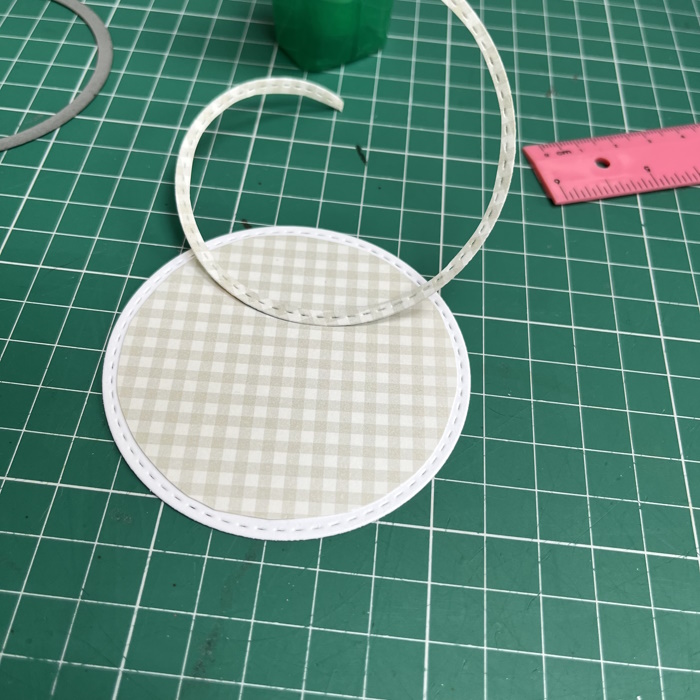
Cut a 3" stitched circle from white card and paper. Cut the paper circle inside the stitch marks and adhere to the card cirlce. 


Adhere to the milk carton lid using foam tape/dots. 


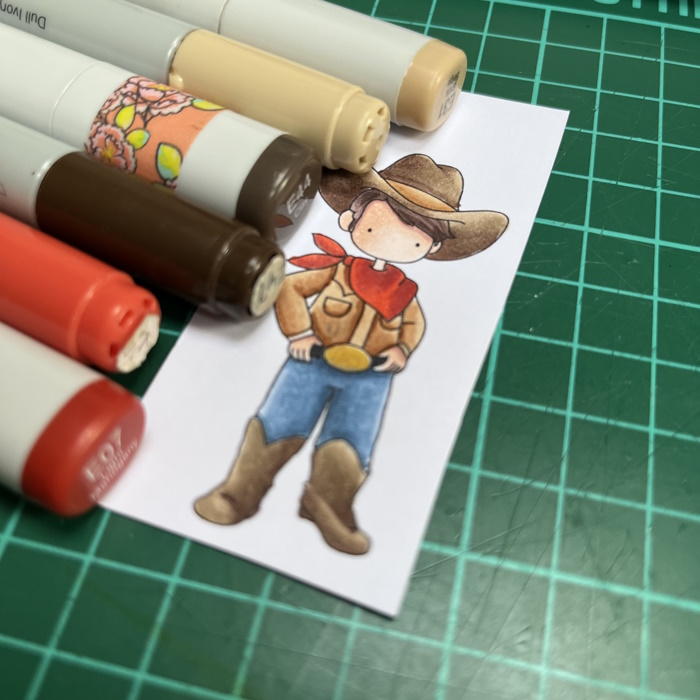
Stamp the boy image from Uptown Cowboy Kids onto white card. Colour, then fussy cut around the outline. 


Stamp a sentiment onto a strip of card. 


Adhere the image to the stitched circle panel using foam dots. 


Curve the sentiment and adhere across the image, trimming the ends. 


Add some enamel dots to embellish. 


For more inspiration check out the Stamping Bella Sisterhood page over on Facebook, where you can add your own Stamping Bella creations.

Where you can find me


Thursday 19 January 2023

Special Delivery Candy Box | Stamping Bella Stamps

Hi all, I'm back with another tutorial and today I'm sharing how I made this Valentine Candy Gift Box featuring Special Delivery


Supplies:
Designer paper
Stitched circle die
Scoring board and bone folder
Adhesive, foam tape or dots
Acetate

Pink card:
(1x) 5.75" x 10.25" (base)
(1x) 3.5" x 8.25" (lid)
(2x) 3.25" x 1.25" (dividers)

Designer paper:
(2x) 6-5/8" x 2-1/8" (base)
(2x) 1-5/8" x 2-1/8" (base)
(1x) 6-5/8" x 2-1/8" (lid)
(2x) 5/8" x 2-1/8" (lid)
(1x) 5/8" x 6-5/8" (lid)

How to:
Score the 5.75" x 10.25" piece of pink card at 1.75" on all 4 sides. 


Score the 3.5" x 8.25" piece of pink card on the 3.5" side at 0.75" and 3", and on the 8.25" side at 0.75" and 7.5" 


On the long side of the 5.75" x 10.25" piece, cut the score lines up to the intersecting horizontal score line. Cut a wedge from each side of the four corner tabs. 


Fold up the corner tabs and apply adhesive to the outsides. Fold them in and adhere to the inside of the adjacent sides to create the box base. 


On the box lid, cut away the end corners from the 1/2" section. On the opposite side, cut up on the score lines to the intersecting line and wedge each side of the corner tabs. 


Adhere the papers to the box lid. Taking a 1.75" - 2" stitched circle die, cut away three circles - spaced evenly along the top. 


Apply adhesive the two end tabs, fold in and adhere to make the box lid. 


Cut a piece of acetate approx. 6-5/8" x 2-1/8" and adhere to the inside of the lid. 


Apply adhesive to the 0.5" section. 


Adhere to the box base, making a flip lid. 


Colour thte Special Delivery image and cut around the ouline. 


Stamp the sentiment on a strip of white card. 


Cut 2 circles using the die use for the box lid. 


Adhere the paper circle to the centre circle on the lid, using foam tape. 


Adhere the card circle underneath, inside the box lid. 


Adhere the Special Delivery image to the box lid using foam tape and then add the sentiment beneath it. 


Take the two 3.25" x 1.25" pieces of card and score them at 0.5" and 2.75"


Fold in the 0.5" sections and crease well so they stay folded down


Apply adhesive to each end. 


Slide the dividers into the box and fold out the ends using a stylus or tweezers. Adhere the ends to the sides of the box as shown. 


For more inspiration check out the Stamping Bella Sisterhood page over on Facebook, where you can add your own Stamping Bella creations.

Where you can find me