Hi all!! Today I'm sharing how I made a Surprise Double Wiper Cardfeaturing Edna the Everything Fairyand an extra sentiment from Edna with a Cupcake on Top. I've also included a video below showing how it works.
I love interactive cards and when I came across this idea recently I had to make one. They are pretty easy to make once you stick to the given dimensions, but it will need a lot more thought and plenty of time for trial & error if you want to make a bigger version. The mechanism is designed to fit this size card perfectly.
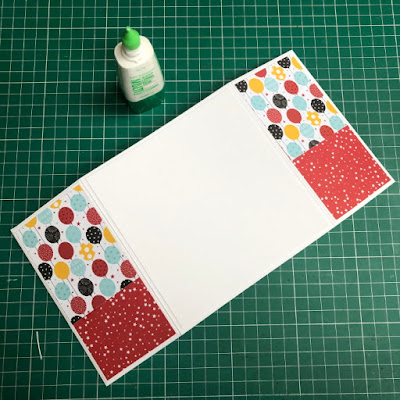
Colour the images using your preferred medium and set aside to make the card base.
To make the wiper mechanism cut one piece of card measuring 2 3/8" x 6" (6cm x 15.2cm)
Score at 1 1/8", 4.25", and 5.5" (2.7cm, 10.7cm, and 13.7cm)
Make a notch at 3 1/8" (7.7cm), top and bottom
Score diagonally from the top 3 1/8" notch down to the 5.5" (13.7cm) score line. Repeat from the bottom 3 1/8" notch up to the 5.5" (13.7cm) score line
Mountain fold both end score lines and the diagonal score lines. Valley fold the 4.25" (10.7cm) line.
For the card base:
Cut one piece of card measuring 5 1/8" x 10.25" (13cm x 26cm). Score at 5 1/8" (6.5cm) on the long side. Fold and crease the score line.
Inside panels:
Cut two pieces of card measuring 5" x 5" (12.8cm x 12.8cm) and two pieces of paper measuring 4 7/8" x 4 7/8" (12.4cm x 12.4cm)
Cut one piece of card measuring 5" x 3 3/8" (12.8cm x 8.6cm) and one piece of paper measuring 4 7/8" x 3.25" (12.4cm x 8.2cm )
Adhere the paper to each of the card panels.
Wipers:
Cut 2 pieces of card measuring 2 1/8" x 2 1/8" (5.4cm x 5.4cm)
Cut two pieces of paper measuring 2" x 2" (5cm x 5cm)
Adhere the two larger panels to the inside of the card base.
On the inside back panel, mark 3 1/8" (8cm) from the score line centered vertically 2 3/8" (6.5cm)
Make a pencil mark in the centre of the wiper mechanism at the 5.5" (13.7cm) score line.
Apply adhesive to the outside of the smaller end and, folding it under and lining up the pencil marks, adhere it down.
Apply adhesive to the outside of other end of the mechanism. Fold the flap under and, keeping it flat, adhere to the inside front of the card base.
Once the glue has dried, fold over the card base and use a bone folder to smooth the score lines on the wiper mechanism.
Open the card up and apply adhesive to bottom triangle as shown.
Adhere one of the 2 1/8" x 2 1/8" (5.4cm x 5.4cm) pieces of card to it.
Repeat for the top wiper, adhering the paper layers and the images too.
Apply adhesive to the large section of the wiper mechanism as shown.
Adhere the 5" x 3 3/8" (12.8cm x 8.6cm) panel, burnishing well with a bone folder
For the card front:
Cut one piece of card measuring 4/78" x 4 7/8" (12.4cm x 12.4cm) and a selection of papers to decorate as preferred.
Fussy cut around Edna and the single cupcake. Adhere both to the card front using foam tape/dots, placing the cupcake in Edna's hand.
Stamp the sentiment from Edna the Everything Fairyonto a strip of card and cut to size. Adhere to the card front and embellish as desired.
For more inspiration check out the Stamping Bella Sisterhood page over on Facebook, where you can add your own Stamping Bella creations.
Happy Friday!! Today I am sharing my Stamping Bella Bellariffic Friday card.
Our theme this week is
Stamp of the Month Collection
The stamp of the month for February is Oddball Cupid and you can grab her at 50% off for the whole month, while stocks last. The whole Design Team is showcasing Oddballs over on the Bella Blog.
Hi all. Today I am sharing how I made this Pop Out Card featuring Oddball Geek. I saw a die recently that was designed to make this card and just by looking at the die I could see it would be an easy card to make by hand. There is a little bit of cutting for the layers, but the base of the card is simple scoring and folding.
Cut the image out using a circle die, and a cut a larger paper circle layer.
Set the image and the sentiment aside.
For the card base:
Cut 2 pieces of white card measuring 11" x 5.5"
Score both pieces on the 11" side at 2.75" and 8.25"
One ONE of the 11" x 5.5" pieces, make a notch at the 5.5" at the top and bottom, on the 11" side.
Score from each of the outer corners, diagonally, to the 5.5" marks.
Mountain fold the 2.75" and 8.25" score lines, and valley fold all the diagonal score lines.
Fold in the outer panels and crease all the score lines.
On the back of the folding mechanism, apply adhesive on the centre panel and the 2 outer large triangles.
Adhere the front folding mechanism to the back piece of the card base.
For the layers, cut:
2x 3.75" squares of card
2x 3.5" squares of card
2x 2 5/8" x 5 3/8" pieces of card
1x 5.25" square (back of card - optional)
Cut one of the 3.75" pieces diagonally
Cut both 3.5" pieces diagonally both ways to make 4 triangles.
1x 3.5" pieces of paper
2x 3.25" piece of paper
2x 2.5" x 5.25" piece of paper (and extra layers to decorate)
Cut the 3.5" pieces diagonally
Cut both 3.25" pieces diagonally both ways to make 4 triangles.
Adhere all the paper pieces to the card pieces and then adhere them to the card front and back.
Cut a 3.5" square and a contrasting 3.25" square to layer into the centre diamond.
Adhere the layered sentiment into the centre.
To create a belly band, cut a piece of card measuring 2.75" x 11.75" (this is the length of an A4 sheet of card).
Centre the card strip over the card and bend around to the back. They should slightly overlap. Apply adhesive to the end that overlaps and adhere it to the other end.
Cut a piece of paper measuring approx. 5.5" x 2.5" for the front and back of the belly band.
Cut a piece of red paper larger than the image. Adhere the image to the circle using 3D foam dots/tape. Use foam dots to adhere the 2nd laptop over the first one, to add extra dimension to the card.
Apply adhesive to the back of the image, just where it will sit on the belly band and stick it down.
Slide on the belly band
Decorate as desired.
The stamp of the month for February is Oddball Cupid and the whole Design Team is showcasing this stamp over on the Bella Blog. You can grab it at 50% off for the whole month, while stocks last.
For more inspiration check out the Stamping Bella Sisterhood page over on Facebook, where you can add your own Stamping Bella creations.