Hi all, Today I'm sharing how to make an Easter Treat Box featuring Oddball Easter Bunny and the sentiment from Chocolate Bunnies rubber stamp set. This gift box is quite large; the gift compartment is 7.5" and goes from 3" on the top to 1" at the bottom.


Supplies:
White card
Easter themed paper
Scoring board and bone folder
Liquid glue
Grass Border Die
Tag Die
How to:
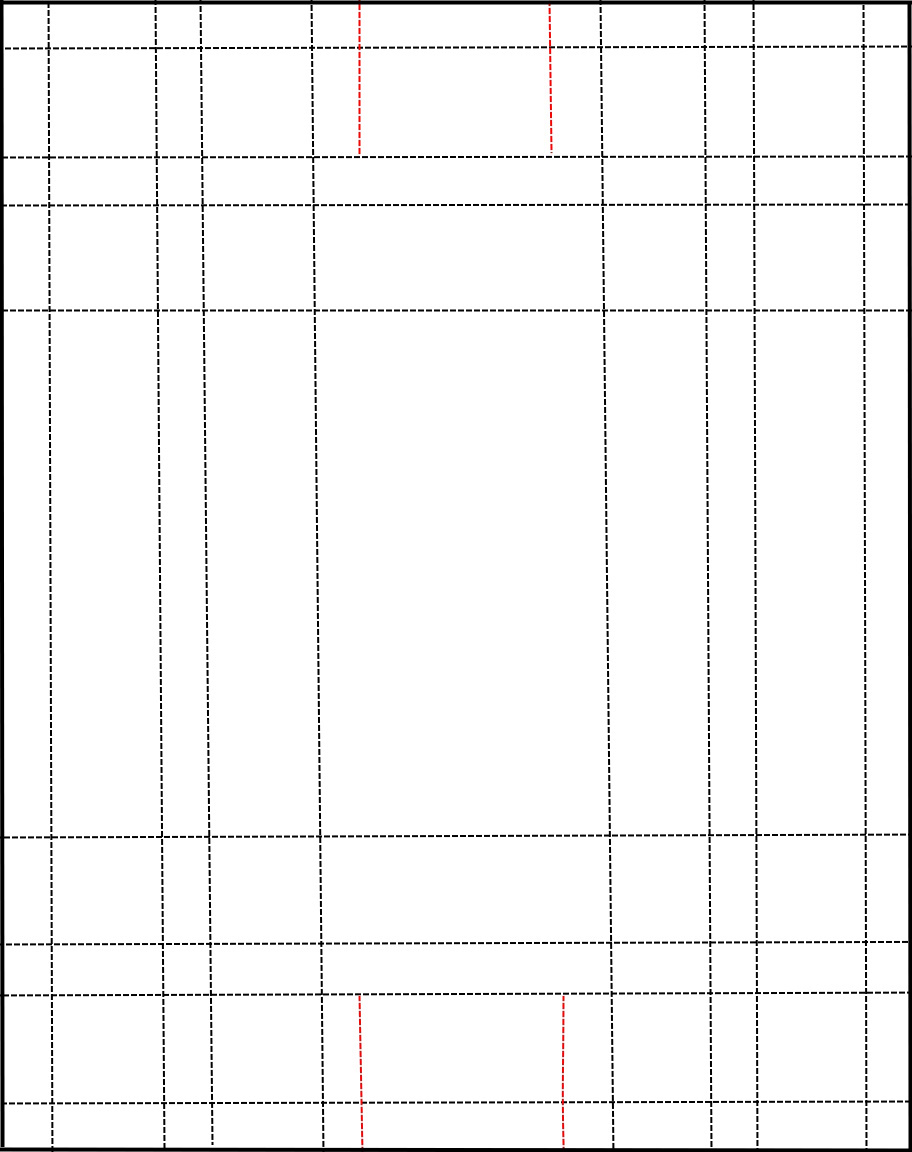
Cut 2 pieces of card measuring 11.5" x 6" and, using the template below, score both pieces.
Note: The 7.5" section determines the length/height of the box; you can adjust this as necessary. For a shorter box, reduce the 7.5" and for a longer box increase it.

Again, using the template below, score where indicated by the dotted lines, then cut the solid red lines, removing the outer 1" squares and the two centre 1" squares. Repeat for both pieces

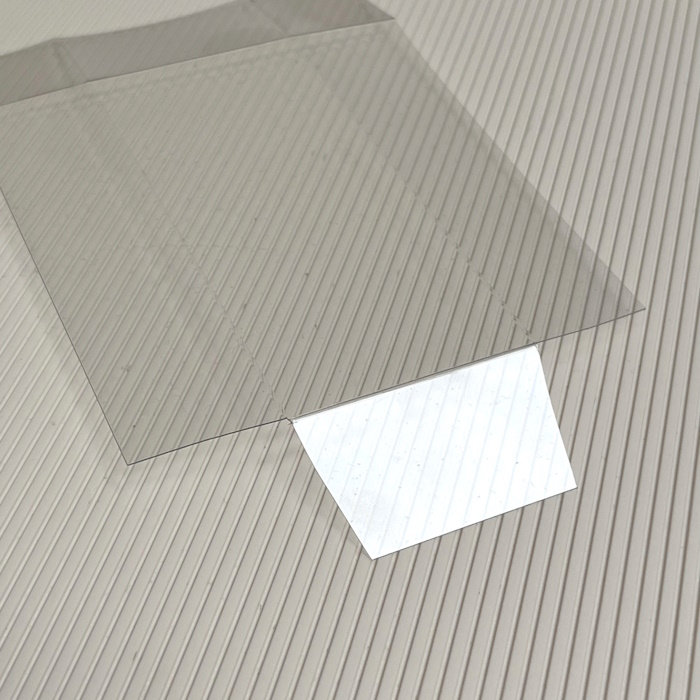
After removing the 1" tabs, the bottom of the base pieces should look like this.

Fold and burnish all of the straight score lines.

Gently fold in the outer diagonal lines ensuring it goes right up to the intersecting score line.


Fold the piece in half and burnish well
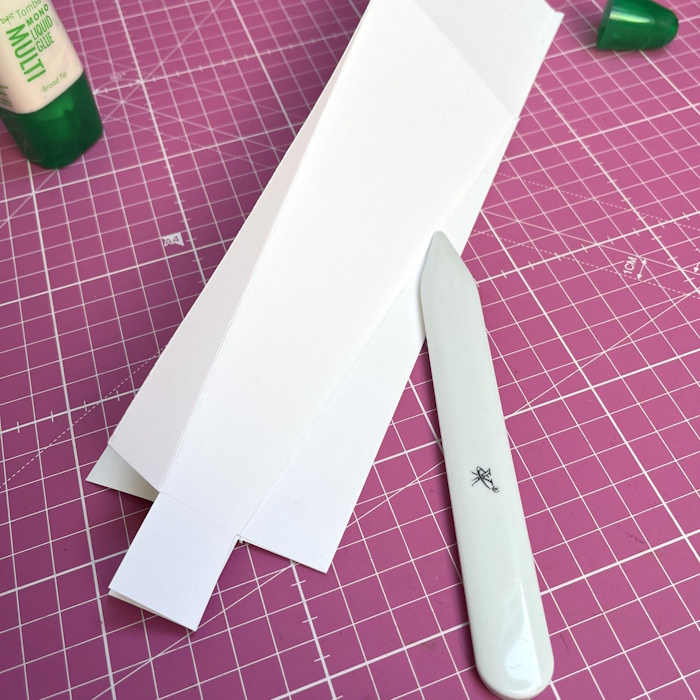
Use a bone folder in the crease to make a crisp line. Repeat for both pieces then set aside to allow the glue to dry.

While the glue is drying on the base pieces of card, stamp Oddball Easter Bunny onto blending card, colour and fussy cut around the outline.

Retrieve the base pieces of card and ensure the glue is completely dried. Cut approximately 0.25" away from the score line to remove the excess card. Repeat on both pieces.

Place both base pieces side by side. Apply glue to the outside of one of the side panels and adhere the other piece to it, lining up the edges. Again, once the glue has completely dried, cut away the excess.


To complete the shape, first cut away the excess from both ends of the card. Apply glue to one of them, fold the base in half and adhere to the other end. Burnish well to ensure it adheres properly.

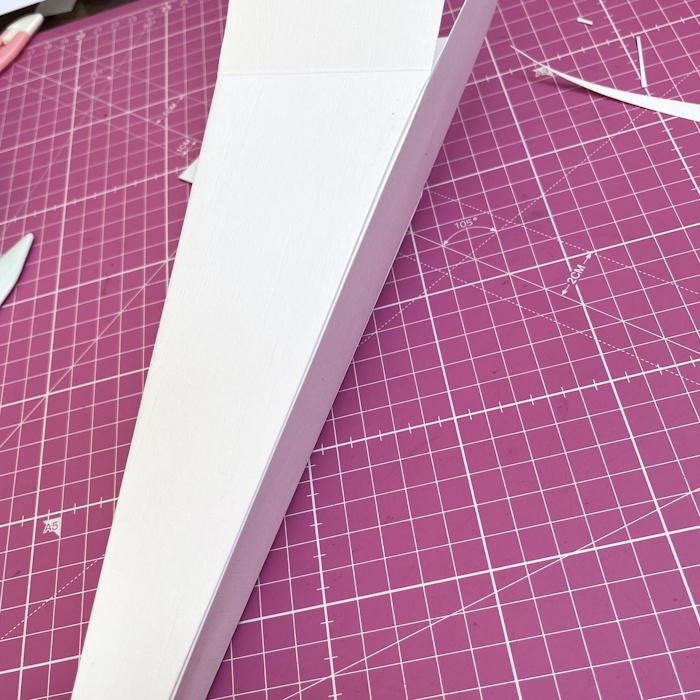
Decide which side will be the front and fold back the 1" tab. Fold in one of the side tabs, apply glue to it and fold in the other side tab on top of it. Apply glue and fold up the back tab. Finally apply glue and fold down the front tab.


Cut four pieces of paper measuring 7.25" x 2.75". On the bottom, measure in 1" from each side and mark with a pencil. Cut from the outer top corners down to the 1" markings to create the paper layers. Adhere all the layers to the base.


On the top of the box (the 3" sections) taper the edges of the side tabs and trim them down by approx. 1/2". Do not trim the front and back tabs. Fold the side tabs in.

Cut two grass border pieces from green card. Bring the front and back top tabs together and wrap one of the borders around it. Trim down the second grass border to fit the width of the tabs and adhere to the back of the folder border. This create a belly band type closure.


Stamp the sentiment from Chocolate Bunnies rubber stamp set onto a piece of card and adhere to the top section of the box using foam tape.


Use the trimmings from the grass border on the bottom of the box and cut some Easter eggs from the papers and decorate.
For more new release inspiration check out the Stamping Bella blog and Stamping Bella Sisterhood page over on Facebook, where you can add your own Stamping Bella creations.
Where you can find me