Pages

Thursday, 6 May 2021

Tiny Townie Unicorn Ease Slider Card | Stamping Bella

Hi all! Today I am sharing a how I made this Slider Easel Card featuring the new Tiny Townie Unicorn stamp.


Supplies:
Card
Patterned papers
Scoring board and bone folder
Craft knife
Tag and Pull Tab die
White twine

How to:
Stamp Tiny Town Unicorn on to white card and colour using your preferred medium. 
Fussy cut around the outline. 


Cut a tag from white card and decorate with paper. Adhere the image to the tag using 3D foam tape. 
Set aside to work on the card base. 


For the card cut:
1 piece at 4.25" x 5.5" (base)
1 piece at 4" x 5.25" (easel)
1 piece at 1" x 9" (pull tab)
1 piece at 3" x 4.25" (easel front)


For the base layer cut one piece of double sided paper at 41/8" x 5 3/8". Adhere the  4.25" x 5.5" piece of white card and set aside.


Take the 4" x 5.25" piece of card and score at 0.5" on each side as shown 


Cut the 2 long score lines and one of the shorter ones. 


Score just the centre section at 2.75" and mountain fold that score line. 


Score the 1" x 9" piece of card at 1" on one end. Fold the 1" section over the front of the card as shown and glue down. 


Apply adhesive to the bottom section of the centre panel and adhere the 3" x 4.25" easel front. 


On the back, apply adhesive around the edges and adhere to the card base. 


Cut a piece of double sided paper measuring 3 7/8" x 5 1/8" and score at 3/8" on all 4 sides. Using a craft knife, cut along all the score lines and remove the centre panel. Trim the centre piece of the paper to 2/78" x 4 1/8" 


Adhere the frame to the outer section of the card front and the centre panel to the easel front. 


Stamp the sentiment from Tiny Town Unicorn onto white card, cut to fit inside the frame, and adhere in front of the open easel using 3D foam tape. This will hold the easel open. 


Adhere the tag with Tiny Town Unicorn onto the card front using 3D foam tape. Thread some white twine though the top of the tag. 


Trim the pull tab to size and adhere a die cut tab pull. 


Decorate with some enamel dots. 


That's it from me for today. 
For more inspiration check out the Stamping Bella Sisterhood page over on Facebook, where you can add your own Stamping Bella creations.

My Social Media Sites


Sunday, 2 May 2021

Oddball Marie | Stamping Bella

Hi all! Today I am sharing a card that was inspired by a question my daughter asked when she saw this new Oddball Marie stamp - "Is that the Queen who lost her head?" - In that moment the idea was born. The sentiment is from the Alice in Wonderland sentiments set.


Copic Markers used:
Skin - E00, E11, E04, BV01
Hair - E50, E51, E53, E33
Dress/Bow - R81, R83, R85, R89. C1, C3, 0
White Gel Pen


Other products used
Paper -Hello Spring from Echo Park. 
Dies - Slim Fancy Fence, Build-a-Basket


That's it from me for today. 
For more inspiration check out the Stamping Bella Sisterhood page over on Facebook, where you can add your own Stamping Bella creations.

My Social Media Sites


Thursday, 29 April 2021

Double Pop-Up Surprise Card | Stamping Bella Tutorial

Hi everyone! I'm back after a very hectic few weeks of study and final exams and today I have a card featuring Curvy Girl Boy Mom from the latest Stamping Bella release. There are some amazing new stamps in the release for Mother's Day. 


This is just a short video showing how the inner cards pop up when the card is opened. 


Supplies: 
Black card
White card
Patterned paper
Scoring board and bone folder
Ruler
Embellishments
Selection of decorative dies. 

How to:
Cut black card:
Base - 6" x 9". Folded in half on the 9" side
Inner cards (2) - 2.75" x 5.5". Both folded in half to make 2.75" square card bases
Pop up mechanisms (4) 2" x 1.5"


Score the mechanism on the 1.5" side at 0.75". 
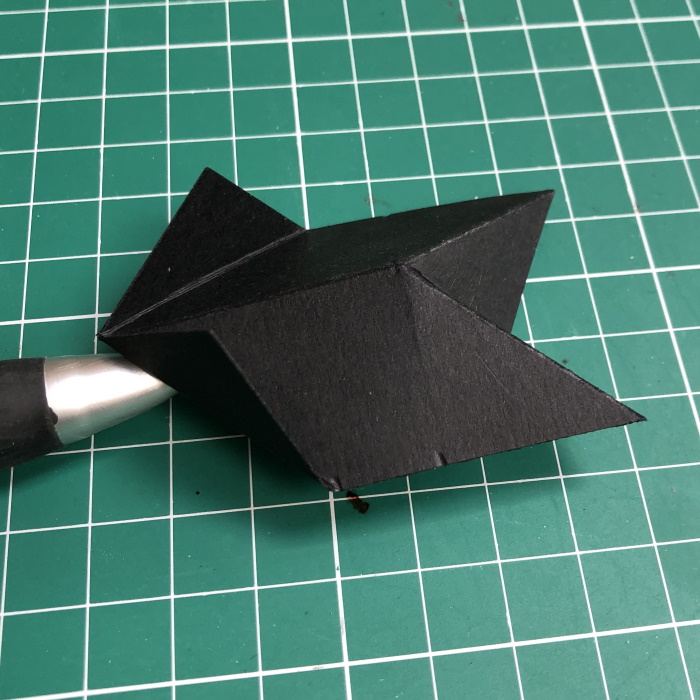
On the 2" side, mark with a pencil or stylus at 0.75" and 1.25". Make a small mark on the centre score line at 1.25". Score as shown. 


At the back section, valley fold the centre score line and mountain fold the diagonal score lines. 


On the opposite end, fold upward on the diagonal lines


Repeat for all 4 pieces


For the layers
White card: 
3 pieces measuring 5 7/8" x 4 3/8" 
2 pieces measuring 2 5/8" x 2 5/8"
Paper: 
3 pieces measuring 5.75" x 4.25" (extra for layering more on the front optional)
2 pieces measuring 2.5" x 2.5"


Adhere the paper to the white card and then adhere the inside panels on both the card base an the inner cards. 


Apply adhesive to the end section of the mechanism 


Place the creased edge of the inner card into the end of the mechanism and press firmly to secure. There are 2 mechanisms for each inner card (positioned as shown below) 


Ensure the folds on the end of the mechanism are pointing up for the bottom lower card, and pointing down for the upper one and they need to pop out in opposite directions. 


Place the inner card on the side back of the card base, with the mechanisms just touching the centre crease. Apply adhesive to the ends as shown. Fold the top of the card over and press firmly. 


Open up the card and apply adhesive to the other side of the mechanisms. Close the card up and press firmly on both sides until the glue has dried. 


Pull open the card and the smaller cards should pop up and out. 


Decorate the front of the card base. 


Stamp Curvy Girl Boy Mom onto white card and colour using your preferred medium 


Cut a scalloped rectangle approx 5.25" x 3.25" and trim the image to fit. 


Apply foam tape to the back of the image and adhere the card front. 


Decorate the inside cards using both sentiments from Curvy Girl Boy Mom and diecuts. 


Add some die cut hearts and enamel dots to decorate the front. 


For more inspiration check out the Stamping Bella Sisterhood page over on Facebook, where you can add your own Stamping Bella creations.

My Social Media Sites