Pages

Thursday, 20 May 2021

Centre Pop-Up Card | Stamping Bella Tutorial

Hi all! Today I am sharing a how I made this Centre Pop-Up Card featuring Tiny Townie Big Brother 


Supplies:
Card
Paper
Scoring board and bone folder
Ruler and pencil
Embellishments

How to:
Stamp Tiny Townie Big Brother onto white card and colour using your preferred medium.
Set the image aside to work on the card. 


Cut white card: 
10" x 5"
10.5" x 5"
4" x 5.25"


Score the 10.5" x 5" piece at 4", 5.25" and 6.5" 


Measure and mark at 0.75" on each side of the 6.5" score line and 0.75" in from the edge on the line. Score diagonally as shown. Repeat on the opposite side.


Valley fold the diagonal lines and mountain fold the centre scoreline. 


On the 5.25" score line mark at 0.5" from each side. Cut a slit approx 1/8" wide from between the 0.5" marks. 


Mountain fold the centre score line. 


Score the 4" x 5.25" piece of card at 0.5" on the long side. 
Score the 10" x 5" piece at 5" on the long side. 


Fold the 0.5" section back and apply adhesive to the under side of it. Line the score line up to the 5" score line of the base card, centered across the width of the base. 


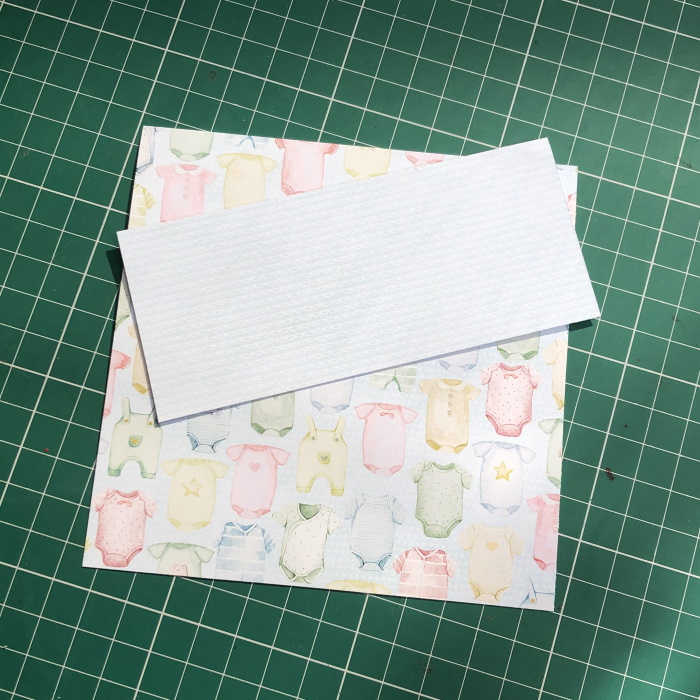
Cut a selection of papers to cover the top of the card and the pop-up flap. 


Slide the pop-up flap through the slit on the top layer. 


Apply adhesive to the underside of the top layer.


Line up with the edges of the card base and stick it down. 


Repeat with the back section.


Cut the image to size, ensuring it is below the slit when the card is open. This will ensure it doesn't snag when opening and closing the card. 


Stamp the sentiment on to a strip of white card and mat with a piece of coordinating paper 


Using foam tape/dots, adhere on the section in front of the pop-up mechanism 


Cut a selection of papers for the outside of the card and decorate as desired. 


For more inspiration check out the Stamping Bella Sisterhood page over on Facebook, where you can add your own Stamping Bella creations.

My Social Media Sites


Friday, 14 May 2021

Celebrate | Stamping Bella

Happy Friday!! Today I am sharing my Stamping Bella Bellariffic Friday card.
Our theme this week is

Vintage
(any stamp not from the newest release)

My card features Close Ups "Clink" and the Celebrate sentiment die (retired)


Copic Markers:
Skin - E00, E04, E11, E21, BV01
Red - R35, R37, R39
Drink - YR30, YR21, YR31
Glass - BG10, C1, BV000

Other Products used:
Card - Papermilldirect
Glossy accents

For more inspiration check out the Stamping Bella Sisterhood page over on Facebook, where you can add your own Stamping Bella creations.

My Social Media Sites


Thursday, 13 May 2021

A Present from Yeti Popping Flap Card | Stamping Bella

Hi all! Today I am sharing a how I made this Popping Flap Card featuring A Gift From Yeti.


Supplies:
Card
Paper
Scoring board and bone folder
Circle dies
Embellishments of choice

How to:
Stamp A Gift From Yeti onto white card and colour using your preferred medium. Fussy cut around the outline. 


To make the card cut:
1 piece of card measuring 6-1/8" x 8.75"
1 piece of card measuring 4" x 7"
1 piece of card measuring 2.25" x 3"

Paper layers
3.75" x 3.75" and 3.75" x 2.75" (inside flap card)
5-7/8" x 3.5" (front)
5-7/8" x 2.5" (inside back of base card)

Stitched circles:
3.5" card
3" paper


Score the 6-1/8" x 8.75" piece of card at 0.5" from each end on the short side


Score on the long side at 3.75" 


With the 3.75" section at the top, but away the 0.5" areas on each side of the 5" section. Taper the edges of the remaining 0.5" pieces. 


Score the 4" x 7" piece of card at 3" on the long side


Fold on the score line and crease well with a bone folder. 


Adhere the paper panels to the inside. 


Score the 2.25" x 3" piece at 0.5" from each end on the short side. 


Fold into a Z shape. Crease the score lines well. 


Apply adhesive on one the 0.5" sections


Line the edge of the z-fold piece to the score line of the folded 7" piece of card. Ensure the 3" section is on top. 


Place the inner card onto the card base lining up in the centre horizontally. Apply adhesive to the 0.5" section. 


Fold down the front panel and line the flip mechanism with the bottom of the front panel. 
Press down firmly to secure the mechanism to the inside front. 


Turn the card over to ensure the flap card is centered and not catching at the side. 


Adhere the 2.5" x 5-7/8" paper panel to the inside bottom 


Apply adhesive to the 0.5" sides, fold down the top of the card and burnish well. 


Pull the inside flap and the inner card pops out. Push the long part of the inner card and it pops back into the base card. 


Adhere the circles together and stick to the front of the card using 3D foam dots/tape.


Use the foam dots/tape to adhere the image to the circles. 


Stamp the sentiment onto white card, trim down to about 3.5" wide and mat onto some paper measuring about 3-7/8" wide


Adhere the sentiment to the inside of the flap card. 


Decorate the front of using die cuts, enamel dots, pull tab, etc. 


For more inspiration check out the Stamping Bella Sisterhood page over on Facebook, where you can add your own Stamping Bella creations.

My Social Media Sites


Friday, 7 May 2021

Mochi Donut Girl | Stamping Bella

Happy Friday!! Today I am sharing my Stamping Bella Bellariffic Friday card.
Our theme this week is

Stamp of the Month

The stamp of the month for February is Mochi Donut Girl and the whole Design Team is showcasing this stamp over on the Bella Blog. You can grab it at 50% off for the whole month, while stocks last. 


Copic Markers:
Skin - E00, E04, E11, BV01
Hair - E33, E35, E51, E53, E55
Donuts - B01, B02, B05. R81,, R83, R85. Y01, Y04, Y08. E50, E51, E53
Plate - BV01, BV02. 
White Gel Pen


Other products used:
Card - Papermill Direct
Paper - Echo Park

For more inspiration check out the Stamping Bella Sisterhood page over on Facebook, where you can add your own Stamping Bella creations.

My Social Media Sites