Pages

Thursday, 7 April 2022

Surprise Pop Up Big Brother Card | Stamping Bella

Hi all! Today I'm back with another Stamping Bella tutorial on how I made this Surprise Pop Up Big Brother Card. I came across a card similar to this on YouTube and thought it was a great idea for Tiny Townies Big Brother. It would also work really well with many other backgrounds and images for all kinds of occasions. 

When folded, this card measures 4.25" x 5.5" and will fit an A2 envelope. 


Supplies:
White Card
Designer Paper (used: P13, Baby Joy)
Scoring board and bone folder
Pencil, ruler, eraser
Acetate
Dies (used: Shadow Box Theater, Window, Labels)

How to:
Stamp the Big Brother image onto white card and colour using your preferred medium. Fussy cut around the outline. 


Cut one piece of card measuring 4.25" x 8" and another piece measuring 4.25" x 4.5" 
Score the 4.25" x 8" piece at every 1" on the 8" side. 


On the 4" score line, measure in 7/8" on each side and mark with a pencil. 


Using a craft knife, cut along each side of the score line, between the 2 pencil marks. 


Cut a piece of strong acetate measuring 2.5" x 4.5" 


From the outside, slide the acetate into the 2.5" slot. 


Turn over to the back. and fold up the first score line. 


Apply double sided tape to the bottom of the acetate - on the side facing down. 


Remove the tape backing and adhere the acetate flush to the folded score line. 


Apply strips of double sided tape across the 1" section, also covering the acetate


Remove the tape backing, fold the opposite end of the card base on the first score line, then adhere both 1" sections together. 


Open into a box shape and the acetate pops up in the middle 


To create the window scene, ink a piece of card the same size as the window and adhere the window outline over it. 


Take the 4.25" x 4.5" piece of card and cover with some designer paper. 


Adhere the window close to the top. 


Add the curtains and border at the top. 


Cut 4 pieces of card to cover the 1" sections at the top and bottom of the box. 


Cover the front 1" section with contrasting paper. 


Adhere the Big Brother image to the acetate, ensuring the feet are below the slot entry so that it won't catch when the card is opened and closed up. 


Stamp the Big Brother sentiment and cut out using a label die. Adhere to the top of the acetate piece. 

Decorate the card. 


For more inspiration check out the Stamping Bella Sisterhood page over on Facebook, where you can add your own Stamping Bella creations.

My Social Media Sites


Thursday, 31 March 2022

Gatefold Slider Card | Stamping Bella

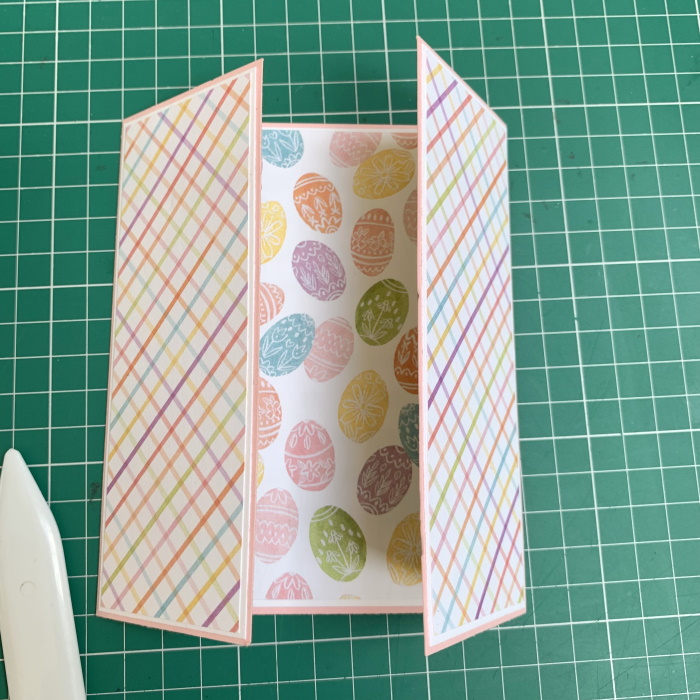
Hi all! Today I'm back with a Stamping Bella tutorial on how to make a Bundle Girl Bunny Gatefold Slider Card. There was a lot of trial and error to figuring out the correct measurements for this card, but I got there in the end and I love how it displays on my dresser. 

The papers I used are Echo Park, My Favorite Easter. 


Supplies:
Card
Easter themed paper 
Scoring board and bone folder
Dies: Clouds, Grass Border, Pennant
Adhesive

How to:
Stamp Bundle Girl Bunny onto white card. Colour using your preferred medium, then fussy cut around the outline. 


Cut a piece of card measuring 9" x 5.5". On the 9" side, score at 2.25" and 6.75"


Fold in the outside sections to make the gatefold. 


For the layers, cut: 
Card - 
(2x) 5-3/8" x 2-1/8" 
(1x) 5-3/8" x 4-3/8" 

Paper -
(2x) 5.25" x 2"
(2x) 5-3/8" x 2-1/8" (inside, no card layer)
(1x) 5.25" x 4.25" 


Adhere down all the card and paper layers. 


Cut two pieces of card measuring 1.5" x 5". Score on the 5" side at 0.75", 1.5" and 4.25"


Mountain fold all the score lines. 


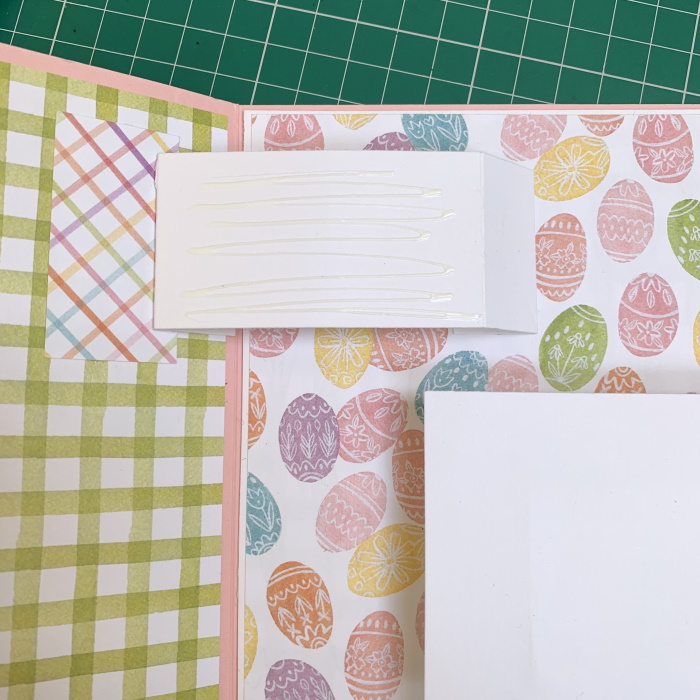
Apply adhesive to the end with one scored section and adhere to the inside card front as shown. 


Apply adhesive to the 0.75" section on the other end, tuck under and, ensuring the card is open flat, adhere to the centre panel. 


Repeat on the top left of the card with the other slider mechanism. 


Cut two pieces of card measuring 3.5" x 2-5/8",  and two more, in a contrasting colour, measuring 3-3/8" x 2.5". Adhere the smaller pieces to the larger pieces. 

Apply adhesive to the 2.75" section of the slider and adhere the card layers. 


Decorate the sliders with paper and die cuts, then adhere the images. Stamp the sentiment from Easter Sentiments stamp set and cut out using a pennant die. 


The card should fold up to fit an envelope.


For more inspiration check out the Stamping Bella Sisterhood page over on Facebook, where you can add your own Stamping Bella creations.

My Social Media Sites