Pages

Thursday, 10 February 2022

Valentine Candy Bag | Stamping Bella

Hi all! Today I'm sharing how I made this Valentine Candy Bag featuring Bundle Girl with Falling Hearts. I'm a bit late with my Valentine's projects this year, but still in time to gift them! 

This super cute box in a bag is so simple to make and will hold all sorts of fun little gifts for Valentine's Day.


Supplies:
Love Sentiments rubber stamp set
Red card, white card
Designer paper (used: P13 - Sugar and Spice)
Distress Oxide Ink pad - Tumbled Glass
Scoring board and bone folder
Corner rounder
Oval Die - 2.5" x 1.5"
Circle Die - 2.75" & Scalloped Circle Die - 3"
Bow Die -1" x 1.25"
Crop-a-dile & eyelet/grommet
Twine

How to:
Stamp Bundle Girl with Falling Hearts and the Love Sentiment onto white card. Colour the image using your preferred medium and then cut out using the 2.75" circle die. 


Leaving the die in place, ink the background using Tumbled Glass distress oxide ink. 


Cut a 3" scalloped circle from red card and mat the image onto it. 
Set the image aside. 


For the inner box, cut one piece of card measuring 5.5" x 8". Score at 2" on all four sides. 


For the bag, cut two pieces of card measuring 4-1/8" x 6.5". Score on the 6.5" side at 1.5". 


On the long side, cut on the score lines up to the intersecting line. Repeat on all four score lines. 
Cut each of the four end sections down to approx 0.5", then taper the edges of them. 


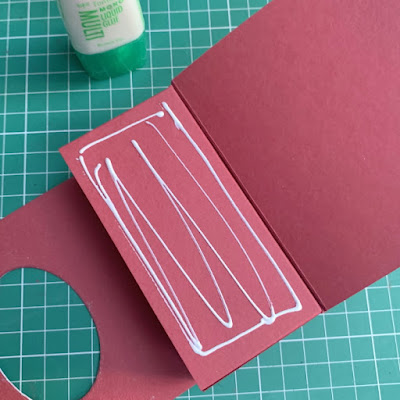
Apply adhesive to the four 0.5" tabs and adhere to the inside of the long sides. 


Round the top corners of both bag pieces. 


Place the bag pieces on top of each other and cut an oval shape from the top, to make the handle. 


Apply adhesive to one of the 1.5" sections at the bottom and adhere on top of the other 1.5" section. 


Cut a 2 pieces of designer paper and adhere to the front and back. 


Turn the back to the inside and use the oval cut out on the card as a guide to cutting the paper. 


To get the bevel edge on the front, place the die over the oval at the front, and run it through the die cut machine again. 


Take the inner box and apply adhesive to the bottom. Adhere to the centre 1.5" section of the bag


Apply adhesive to each side of the box and then adhere the sides of the bag to them. 


Pinch in the sides of the box.


Decorate the front with paper layers and a heart border. 


Adhere the scalloped circle to the front using foam tape/dots. 


Cut the sentiment out using a pennant die. Leave enough room on the end to punch a hole. Add an eyelet/grommet. 


Cut out a bow using the die. 


Tie the sentiment tag onto the handles of the bag, and adhere the bow in the upper corner. 


For more inspiration check out the Stamping Bella Sisterhood page over on Facebook, where you can add your own Stamping Bella creations.

My Social Media Sites


Thursday, 3 February 2022

Bundle Girl Valentine Impossible Box | Stamping Bella

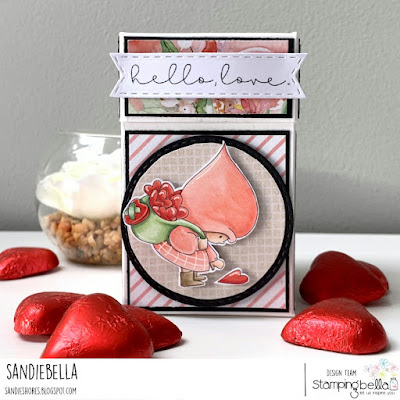
Hi all. I'm back today with a tutorial on how to make a Valentine Impossible Box featuring Bundle Girl with a Heart Trail from Stamping Bella

While this box is called the 'impossible' box, it's actually really easy to make and is such a fun gift - perfect for those Valentine's treats too. This box measures 2.5" wide x 4" tall. 


Supplies:
Love Sentiments rubber stamp set. 
Card - Black, white
Designer paper (used: P13, Love in Bloom)
Scoring board and bone folder
Adhesives
Circle and pennant dies

How to:
Stamp Bundle Girl with a Heart Trail onto a piece of white card, colour using your preferred medium, and fussy cut around the outline. Also colour and cut out the large heart from the trail. 


Set the image aside to work on the box. 

Cut one piece of card measuring 10.25" x 10.5"
Score on the 10.5" side at 2.5", 5", 7.5" and 10"
Turn clockwise and score on the 10.25" side at 2.5", 6.5", 7.75", and 9" 

Fold back on the 7.75" line


Keeping it folded back on the 7.75" line, cut on each of the score lines down to the 6.5" score line, then mark a notch at the top of each of the four 2.5" sections, in the centre (1.25" )


Cut from the centre notch diagonally to the 6.5" score line. Then completely remove the outer 0.5" section. 


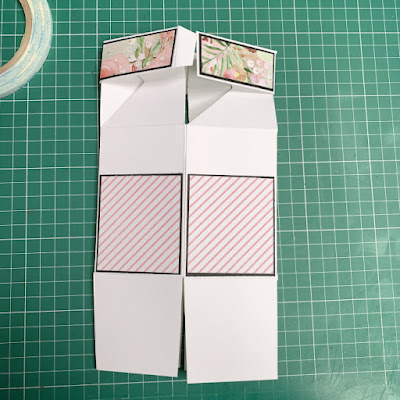
Opened up, it should look like this. 


On the bottom cut each of the score lines up to the 2.5" intersecting score line. Remove the 0.5" section and slightly taper the edges of the remaining 4 sections. 


Fold the top 1.25" section towards you; - i.e. valley fold. Also valley fold the 7.75" score line. Mountain fold all other score lines. 


For the layers, cut four each of:
Card - 2-3/8" x 2-1/8" and 2-3/8" x 1-1/8"
Paper - 2.25" x 2" and 2.25" x 1"

Adhere the paper to the card, then adhere the large panels to the outside of the box. 


Fold the top down, towards you and adhere the smaller panels to the top sections. 


Apply adhesive to the 4" long tab only, and adhere the opposite end of the card to make the box. 


Fold in the tabs at the bottom applying adhesive to the last one to secure it.


Apply adhesive to the small 0.5" tab and tuck under the box top. 


Push down the top of the box until it is in place just above the paper panels, then secure the tab. This ensures there is enough space for the lid to move up and down. 


Stamp the sentiment from the Love Sentiments set, and cut out using a pennant die. Also cut a 2.5" stitched circle from both black card and contrasting paper. 


Trim around the edges of the stitched circle, just inside the stitches 


Adhere the paper to the card and then adhere the image using foam tape/dots. 


Adhere the image circle to the box, again using foam tape/dots and then adhere the sentiment across the top section 


For more inspiration check out the Stamping Bella Sisterhood page over on Facebook, where you can add your own Stamping Bella creations.

My Social Media Sites