Hi all. Today I am sharing how I made this Floating Gatefold Card featuring Tiny Townie Astronauts.
I included a belly band but this is optional. If you choose not to use the belly band you should adhere the image to one side of the font only.


Supplies
Tiny Townie Astronauts set of stamps (includes four character stamps and two sentiment stamps)
Black card, white card
Designer paper ( ScrapbookGems: Outer Space digi papers and clipart {Etsy})
Scoring board and bone folder
Pencil
Adhesive
Embellishments
How to:
Stamp two Tiny Townie Astronauts for inside the card, and one for the front, onto white card and colour using your preferred medium.


Cut the two image for inside using a 2.75" square die. Cut a square of black paper measuring 3" and a layer of paper measuring 2-7/8". Adhere all three pieces together to make the floating panels. Set aside.

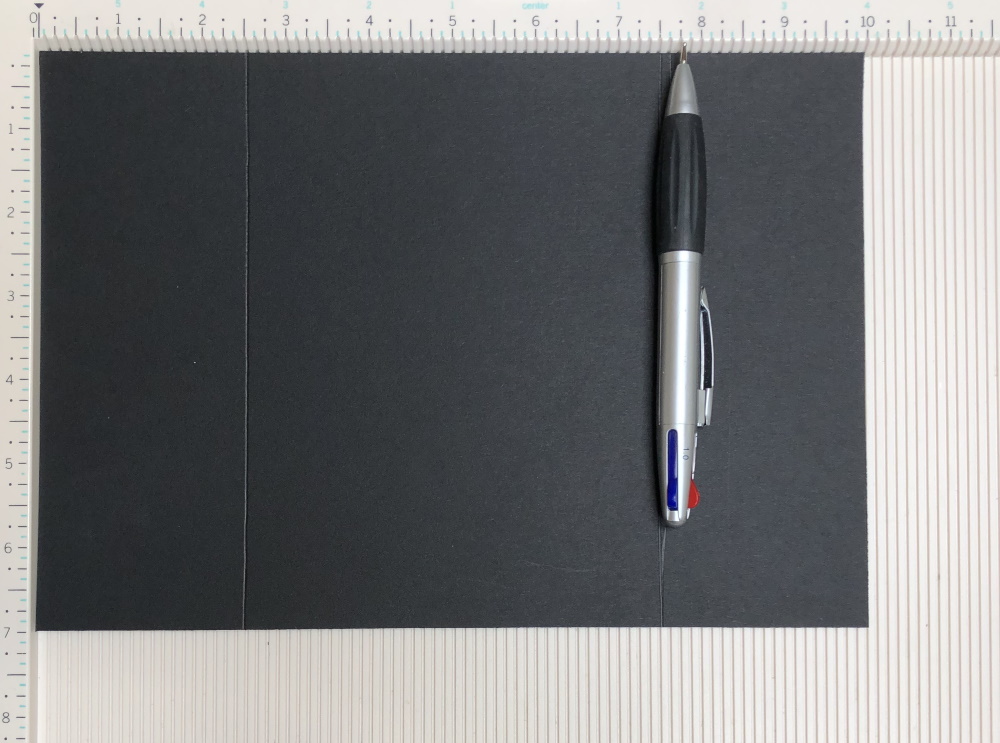
To make the gatefold base, cut a piece of black card measuring 7" x 10". On the 10" side, score at 2.5" and 7.5". Fold in the outer sections and burnish the score lines.

For the layering panels cut
White Card:
4 pieces at 6-7/8" x 2-3/8"
1 piece at 6-7/8" x 4-7/8"
Designer paper:
4 pieces at 6.75" x 2.25"
1 piece at 6.75" x 4.75"
Adhere all the paper layers to the white card layers

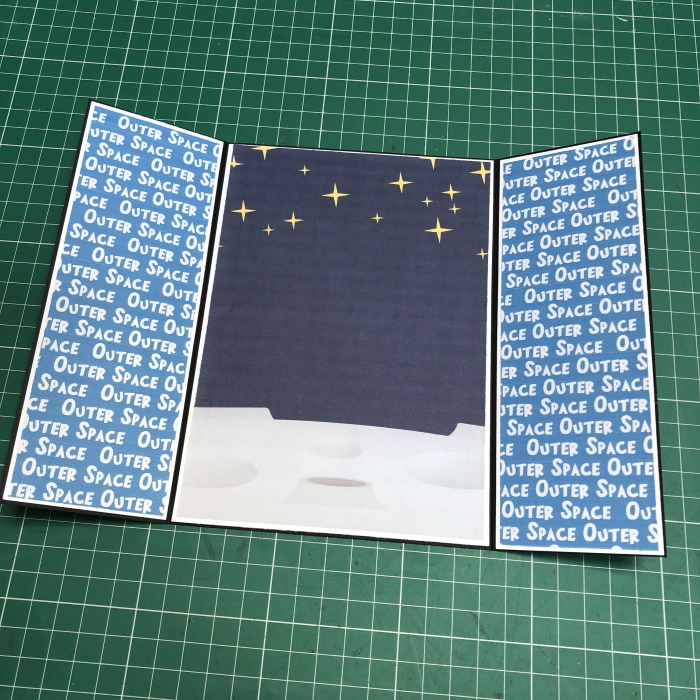
Adhere the layering panels to both the inside and outside of the outer 2.5" sections, and to the inside back.

To make the floating mechanisms, cut two pieces of black card measuring 1" x 6". Score at 1", 2" and 5". Fold and burnish the score lines.

On the 3" section of the floating mechanism, apply adhesive to the 3" section and adhere the image to it - centered. For the left side image ensure that the single 1" section is to the left of the image and the 2x 1" sections are to the right of the image. For the right side image, ensure the single 1" section is to the right.

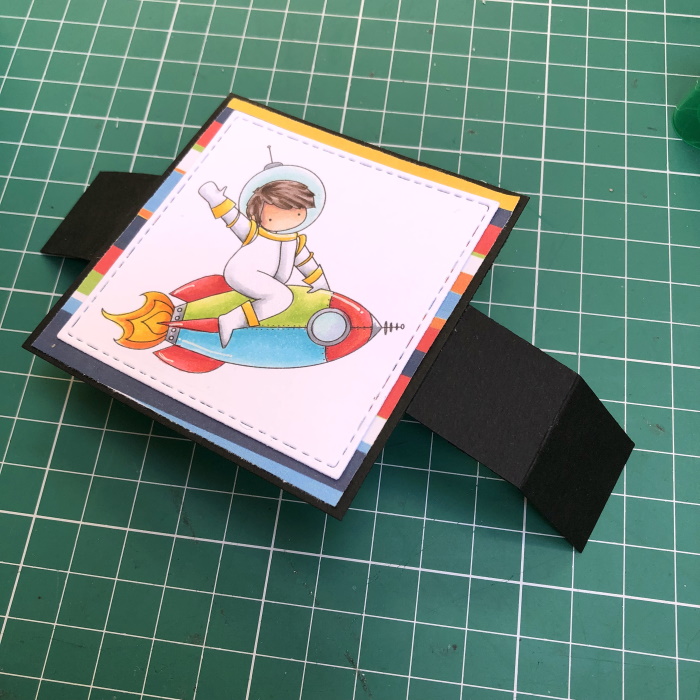
Apply adhesive to the 1" section to the left of the image. (on the right side image, apply adhesive to the 1" section to the right of the image)

Line the 1" tab up against the left side score line. Ensure the image is straight and about 1/4" down from the top. Fold over the outer flap and burnish to get a good bond.


On the opposite end, apply adhesive to the end 1" section. Remove the tape liner if using DS tape, tuck the 1" tab under and adhere to the card base.


Belly Band (optional)
Cut a strip of black card measuring 1" x 11.75". Centre across the card and fold the sides around so that it's just tight enough to stay in place, but not too tight that it can't be removed. Apply adhesive to the end adhere together. Layer on a piece of white card measuring approx. 5" x 0.7-8" and a paper layer measuring 4-7/8" x 0.75", both front and back.


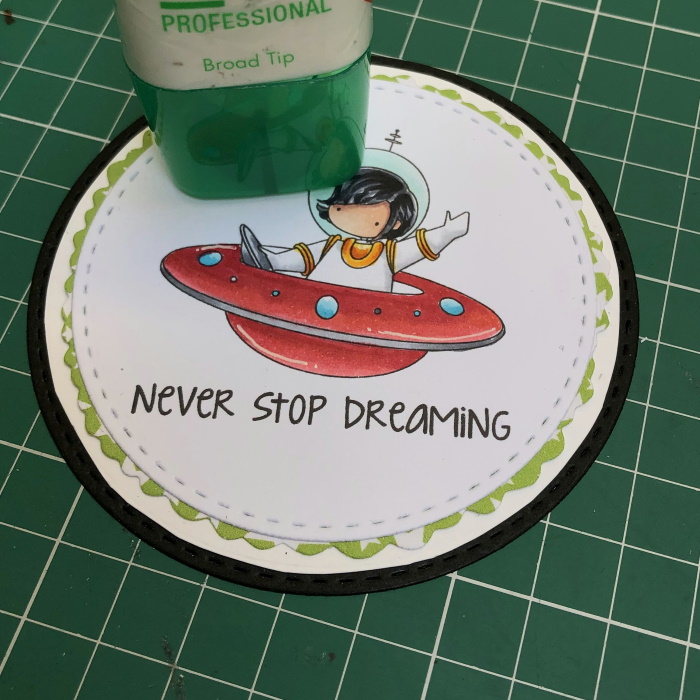
Cut the front image out using a stitched circle. Cut some mats and layers and adhere them all together.
If you are opting not to make a belly band, adhere the image to one side of the card front to finish off the card. If you are making the belly band, follow the instructions below.
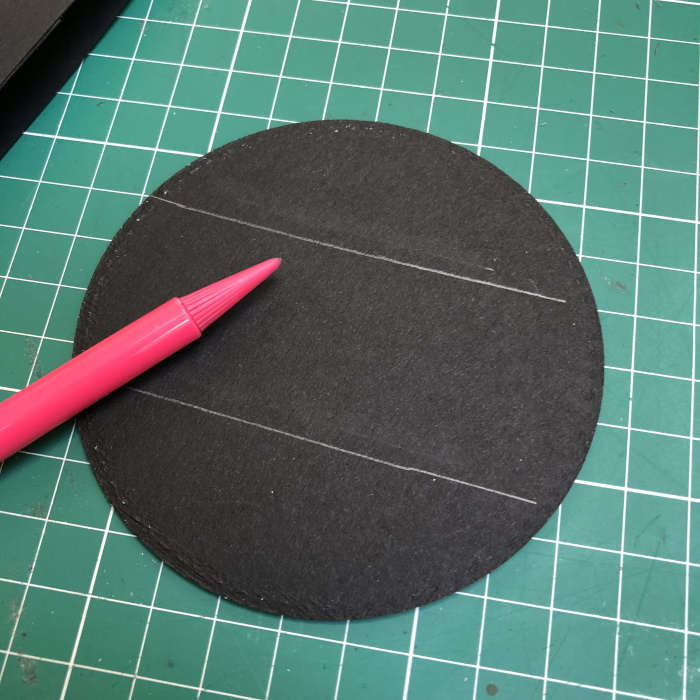
Lay the circle panel centered on the belly band,, hold in place and turn over. Draw a line each side of the belly band to mark where adhesive should be placed. Adhere the circle panel to the belly band.


Slide the belly band onto the card.

Embellish the front and inside as desired, ensuring to keep the embellishments on the inside flat to ensure the card closes and the belly band fits.
For more inspiration check out the Stamping Bella Sisterhood page over on Facebook, where you can add your own Stamping Bella creations.
My Social Media Sites


No comments:
Post a Comment