Pages

Thursday, 27 January 2022

Oddball White Rabbit Peek-a-Boo Card | Stamping Bella

Hi all! I am back with another Stamping Bella tutorial. Today I am showing you how I made this Peek-a-Boo card featuring Oddball White Rabbit. This card really is so easy to make and the peek-a-boo panel is such a fun interactive element. 


Supplies:
Cardstock - White, black, and red
Scoring board and bone folder
Ruler, pencil, and eraser
Designer paper (used: Kora - Wonderland)

How to:
Stamp Oddball White Rabbit onto white card, colour with your preferred medium, and fussy cut around the outline. 


Set the image aside. 

For the card, cut :
White card - 8.5" x 5.5" (base) and 6.5" x 5.5" (insert)
Black card - 5.25" x 4"
Red card - 4.75" x 3.5" (front panel) and 4.5" x 3" (peek-a-boo panel)
White card or patterned paper 4.25" x 2.75" (peek-a-boo panel)


Score the 8.5" x 5.5" piece of card at 4.25" to make the card base  


Score the 6.5" x 5.5" insert piece on the long side at 3.5" 


On the card base, measure and draw a line at 2.25" from the centre score line.


Measure in 0.5" (top and bottom) and draw a line to the 2.25" pencil line. 


Cut away the 2.5" sections to the intersecting score line


Take the insert piece and apply adhesive to the 3.5" side


Adhere to the card base


Cut paper - 5.25" x 3.25" and 5.25" x 2.75" and adhere to the insert.


Close up the card and then bend up the top slightly so you can see the tab of the card base. Apply adhesive just to this small section.


Open up the card and, lining up the bottom of the peek-a-boo panel with the tab, adhere down.


Adhere the white card or patterned pater to the panel. 


Close up the card and the peek-a-boo panel should be completely hidden inside. 


To create the front panel cut a selection of paper layers. 


Assemble the front panel then adhere the White Rabbit using foam tape/dots. Cut a sentiment from the Alice in Wonderland Sentiments and cut out using an oval die. Adhere flat beside the rabbit 


Stamp the sentiment from the Birthday Sentiments set onto a strip of white card. Adhere to the peek-a-boo panel. 


Apply some enamel dots to decorate


For more inspiration check out the Stamping Bella Sisterhood page over on Facebook, where you can add your own Stamping Bella creations.

My Social Media Sites


Thursday, 20 January 2022

Mini Oddball Superhero 4-Fold Card | Stamping Bella

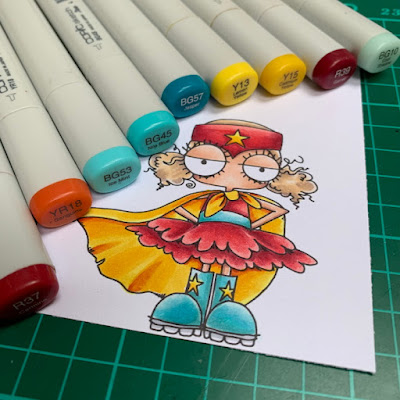
Hi all. Today I'm sharing how I made a 4-Fold Card featuring the new release Mini Oddball Superhero from Stamping Bella. 


Supplies:
White card
Designer paper (used: P13 Happy Birthday)
Scoring board and bone folder
Precision scissors 
Selection of dies for embellishment (used: stitched tag corner, stitched pennant, stitched stars)

How to:
Stamp Mini Oddball Superhero onto white card. Colour and fussy cut around the outline with a precision scissors. Set aside to work on the card. 


Cut one piece of card measuring 5.5" x 11.5". Score at 0.25", 3.75", and 7.25"


Turn 90 degrees so that the 0.25" score line is at the top, then score down at 5/8" to the 7.25" line. 


Along the 5/8" score line to the intersecting 7.25" line


Mountain fold the 3.75" score line, and valley fold the others. 


On the 0.25" section, measure to 4" from the bottom and cut away the rest.

Cut a piece of card measuring 4" x 2.75"
Apply adhesive to the 0.25" strip and adhere the card to it. 


This is what the card should look like now. 


For the paper layers, cut:
1x   5.25"x 4" (large panel)
2x   3.25"x4.25" (medium panels)
2x   2.5"x3.75" (small panel, back and front)


Stamp the accompanying sentiment and cut out using a pennant die. Cut a selection of shapes and embellishments. 


Adhere Mini Oddball Superhero onto a stitched tag corner diecut using foam tape and then adhere the panel to the card front, again with foam tape. Decorate the front and inside of card, creating a pocket for a gift card or cash. 


For more inspiration check out the Stamping Bella Sisterhood page over on Facebook, where you can add your own Stamping Bella creations.

My Social Media Sites