Hi all 😀 I'm back today with another Stamping Bella step-by-step. This week I made this Flip Top Pocket Album featuring Cherry Blossom Branch. I love the sentiment with this stamp and thought it was perfect for a photo album. The album has 8 pockets and 14 photo mats. The pockets can be used for extra photos, tags, newspaper clippings, handwritten notes, and even greeting/gift cards.
The papers I used on this project are Let Your Creativity Bloom from Piatek Trzynastego (or P13)

Supplies:
Designer paper
Scoring board and bone folder
Magnets
Stitched rectangle die
Glittered enamel dots
How to:
Cut card:
(2x) 8.5" x 4-1/8"
(1x) 5" x 4-1/8"
(1x) 4" x 10.5"
(8x) 5.75" x 8.25"
(1x) 4-7/8" x 3.25" (white card)
Cut papers:
(2x) 5-7/8" x 4"
(2x) 4-7/8" x 4"
(2x) 1-7/8" x 4"
(14x) 3-7/8" x 5-5/8"
(1x) 4-7/8" x 3"
Score both 8.5" x 4-1/8" pieces of card at 6" and 8". Join them together by adhering the 6" section of one to the 0.5" section of the other. This creates the front, bottom, back and top of the album. The 4-1/8" x 5" piece of card (added later) adheres to the other 0.5" section to create the front of the album.

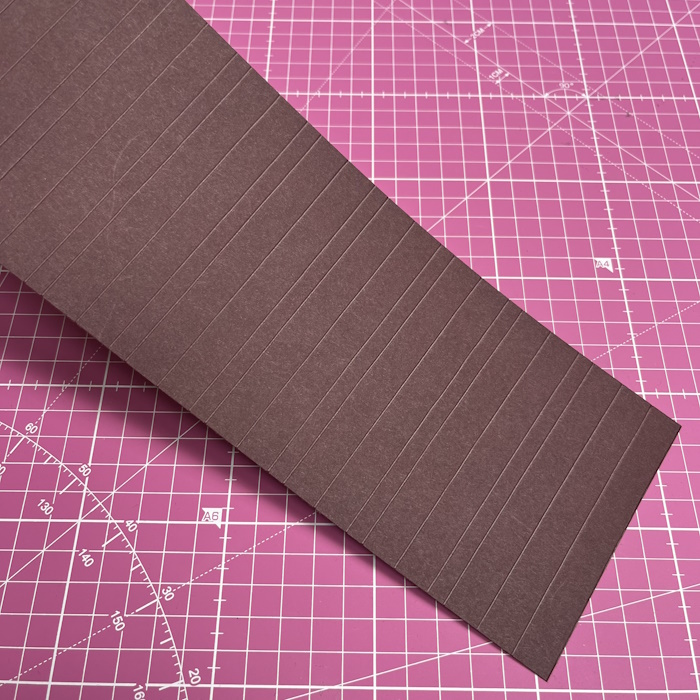
Score the 4" x 10.5" piece of card at 0.5", 1", 1.5", 1.75", 2.25", 2.75", 3", 3.5", 4", 4.25", 4.75", 5.25", 5.5", 6", 6.5", 6.75", 7.25", 7.75", 8", 8.5", 9", 9.25, 9.75, 10.25.
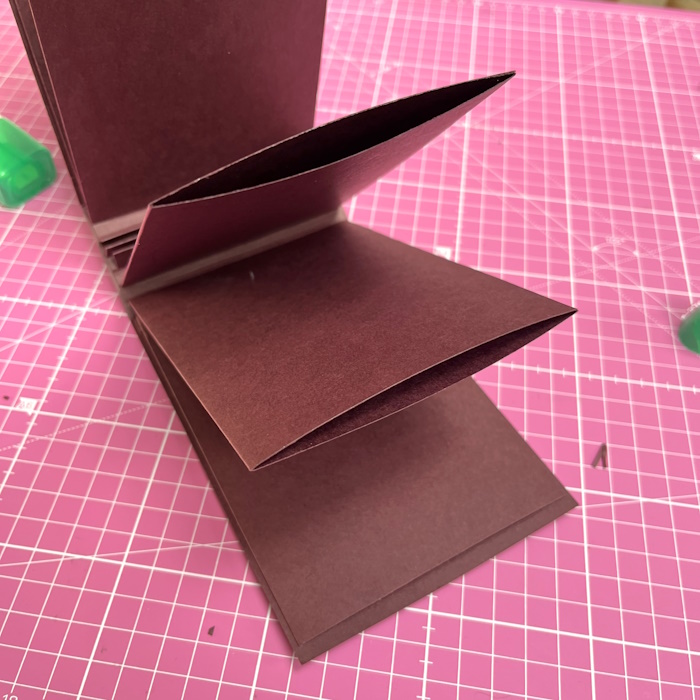
The 0.5" each end adhere to each side of the bottom section. Working from the 1.5" score line mountain fold the centre score line between each 0.5" sections and valley fold the lines each side of the 0.25" sections.
Apply double sided tape on one side of the 0.5" sections.

Remove the backing from all of the tape except the end 0.5" sections. Push the mountains together to form tabs.

Turn over and apply double sided tape across the back.


Apply adhesive to the 0.5" section of the 8.5" x 4-1/8" piece and adhere to the 5" x 4-1/8" on the opposite end to the rounded corners. This is the front flap.

Adhere the tabs into the 2" section, ensuring the 0.5" score lines line up with the score lines each side of the 2".


Score the 5.75" x 8.25" pieces of card at 4" and 8". Cut a wedge from each end of the 0.25" section. Apply adhesive, fold over on the 4" score line and adhere to make a pocket.


Apply adhesive to both sides of the first tab and slide the pocket down over it. Press down well to ensure the pocket is secure.


Place a magnet on the front of the album, approx 3.5" down. Glue paper over it to secure it in place, then attach the other magnet to it. Apply a strong glue dot then fold down the front flap to adhere the magnet to it.


Adhere paper over the magnet on the inside of the front flap. Close up the album and it should stand up.

Cover the front and back of all the pockets with the paper pieces, and adhere all the outside papers.


Adhere the 4-7/8" x 3" piece of paper to the 4-7/8" x 3.25" piece of white card and adhere to the front of the album.


Adhere to the front, over the Cherry Blossom Branch, using foam tape. Embellish with some glittered enamel dots.

For more inspiration check out the Stamping Bella Sisterhood page over on Facebook, where you can add your own Stamping Bella creations.
Where you can find me


No comments:
Post a Comment