Pages

Showing posts with label Smoochie Squidgy. Show all posts

Thursday, 24 February 2022

Smoochie Squidgy Easel Drawer Card | Stamping Bella

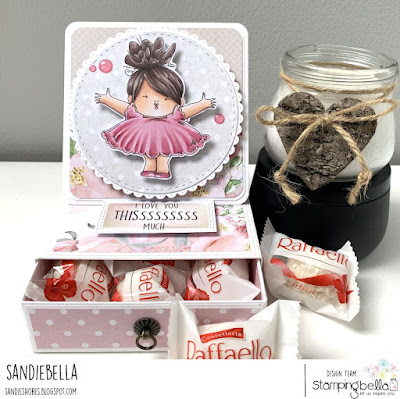
Hi all! Today I am sharing how I made an Easel Drawer Card featuring Smoochie Squidgy It's been a while since I coloured up on the Squidgies, so I dusted off this cutie. 

Supplies:
Smoochie Squidgy rubber stamp set. 
White card
Designer Paper (used - P13 Hello Beautiful)
Scalloped and Stitched circle dies. 
Rectangle dies
Drawer handle
Scoring board and bone folder
Corner rounder

How to:
Stamp the large Smoochie Squidgy and the sentiment onto pieces of white card. Colour the image and fussy cut around the outline. Set aside to work on the box card. 


Cut card:
9.25" x 9.25"
4.25" 11.75"
4.25" x 8.5"
4.25" x 4.25"
4-1/8" x 4-1/8" (x2)
1-1/8" x 4-1/8" (x6)

Designer paper:
4" x 4" (x2)
1" x 4" (x6)
2" x 4-1/8" (x2)
2-1/8" x 4-1/8" (4)


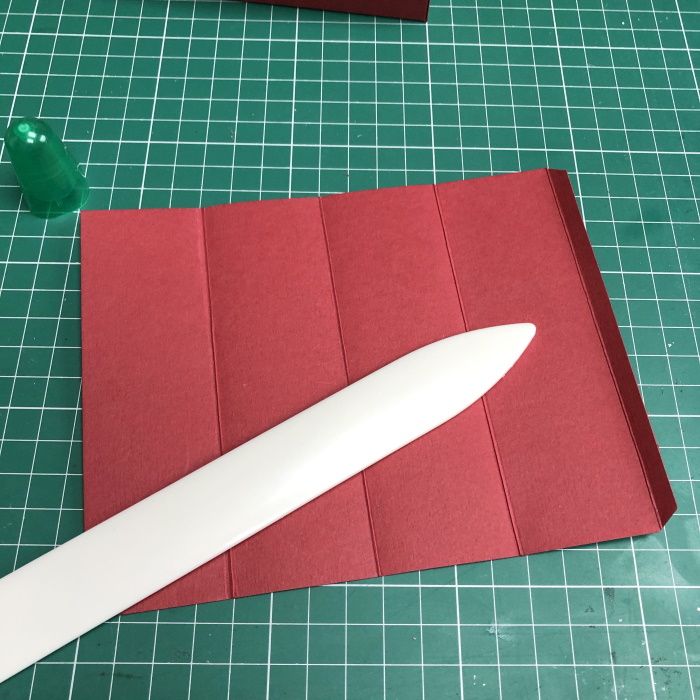
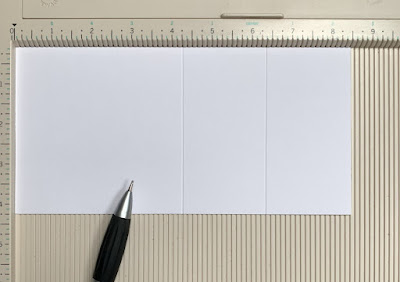
For the drawer wrap, take the piece of card measuring 4.5" x 11.75". Score at 1-5/16", 5-5/8", 6-6/15" and 11.25"


For the drawer insert, take the piece of card measuring 9.25" square and score at 1.25" and 2.5" on all four sides. 


For the easel score the piece of card measuring 4.25" x 8.5" at 4.25" and 6-3/8"

On the 9.5" square piece, cut away the outer three 1.25" sections and cut upward on the remaining one to make tabs. Take a small wedge from each side of them. 


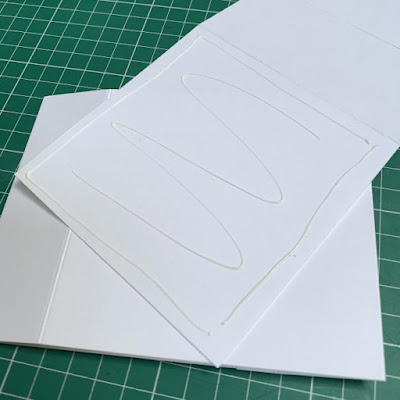
Appy adhesive to the outside of the tabs and then adhere them to the inside of the adjacent sides. 


Apply adhesive to the inside of the outer large tabs and fold into the box. Use a bone folder to burnish well. 


Apply adhesive to the 0.5" end of the 4.5" x 11.75" piece of card and adhere to the opposite end. 


Ensure the box fits inside. It will be a little loose as the decorative layer haven't been added yet. 


Adhere the small strips of paper to the small strips of card and adhere four of them to the sides of the drawer. 


Apply adhesive to the 4.25" section of the easel and adhere to the top of the drawer wrap. 


Adhere the final two strips or card/paper to the sides of the drawer wrap. 


Round the corners of  the bottom top section of the easel and one of the 4-1/8" squares 


Fold the top of the easel on the 6-3/8" score line and apply adhesive only to the bottom 2-1/8" section


Adhere the 4-1/8" piece of card to it. 


Round the corners on the long side one 2" x 4-1/8" piece of paper. Adhere both pieces inside the easel. 


Adhere one of the 4" square pieces of paper to one of the 4-1/8" square pieces of card and adhere to the large section of the easel/drawer wrap.


In the centre of the drawer front (5/8" down and 2-1/8" across) make a small + with a craft knife. Insert the handle 
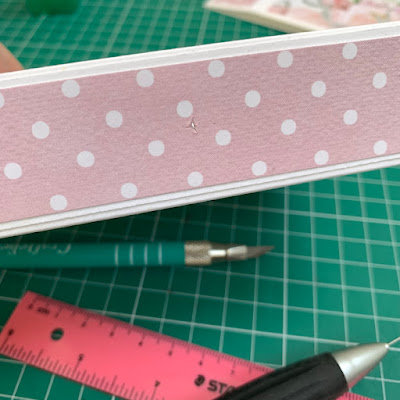


Adhere the 2-1/8" x 4-1/8" pieces of paper inside the drawer. 


Round the corners on the remaining 4-1/8" square card and 4" square paper, adhere them together and then adhere them to the front of the easel. 


Cut a 4" scalloped circle and a 3.75" stitched circle. Adhere them together and, using foam tape, stick it to the easel front. 


Cut the sentiment using a stitched rectangle die, then ink while the die is in place. Apply foam tape to the back. Push the easel into place then adhere the sentiment in front of it. This will be the stopper for holding the easel open. 


Adhere Smoochie Squidgy to the circle panel, again using foam tape/dots. Add some glitter dots to embellish. 


Fill the drawer with chocolates or a small gift. 


For more inspiration check out the Stamping Bella Sisterhood page over on Facebook, where you can add your own Stamping Bella creations.

My Social Media Sites


Thursday, 21 January 2021

I Love you THIS Much | Stamping Bella Tutorial

Today I'm sharing another Stamping Bella Tutorial - a Valentine Gift Set featuring the Smoochie Squidgy rubber stamp set


Supplies:
Red card
White card
Designer papers
Scoring board and bone folder
Adhesive
Dies - Scalloped circle, stitched circle, stitched tags, pennant & heart (optional)

How to:
Stamp one large and two small Smoochie Squidgy on to white card. and colour using your preferred medium. Fussy cut around the outline of each image. Set the images aside to work on the gift set. 


For the Candy Box, cut:
1x   4.5" x 8" piece of red card
1x   6.5" x 5" piece of red card
4x   4 7/8" x 1 3/8" pieces of white card
4x  4.75" x 1.25" pieces of patterned paper


Score the 4.5" x 8" piece of red card on the 8" side at 1.5" and 6.5". Flip to the 4.5" side and score at 1.5" and 3".


Cut on the 1.5" and 3" score lines up to the intersecting score line, on both ends. Taper the edges of the outside tabs and trim them down a little. 


Apply adhesive to the outer tabs and adhere to the inside of the centre tab. Repeat on the other side. to create a box shape. 


Score the 6.5" x 5" piece of card on the 6.5" side at 0.25". Take the opposite end and fold it up to the 0.25" score line, crease with a bone folder, then fold each half in half again. This will create four 1-9/16" sides and a 0.25" tab. 


Apply adhesive to the 0.25" end and adhere to the opposite end to make the sleeve for the box. 


Ensure the box fits before adding the layers. 


For the Bottle Tag, cut one piece of card measuring 2.5" x 6 7/8". Score at 0.25" and 2 3/8"


Cut out a 1.5" circle between the score lines. Fold down the 0.25" score line and crease with a bone folder. 


Cut a piece of white card measuring 2 1/8" x 4 3/8" and a selection of paper to decorate. 


For the Card, cut:
1x   4.75" x 11.5" piece of red card
1x   4.5 x 5.25" piece of white card
Selection of papers to decorate. 


Cut a selection of die cuts for the box, card and bottle tag. 

For the ends of the Candy Box, cut
2x  1 3/8" x 1 3/8" pieces of white card
2x   1.25" x 1.25" pieces of patterned paper


Decorate as desired and adhere the images to the front


Adhere a belly band around the box sleeve and adhere the layers on each end of the candy box. 


For more inspiration check out the Stamping Bella Sisterhood page over on Facebook, where you can add your own Stamping Bella creations.

My Social Media Sites