Pages

Showing posts with label Special Delivery. Show all posts

Thursday, 19 January 2023

Special Delivery Candy Box | Stamping Bella Stamps

Hi all, I'm back with another tutorial and today I'm sharing how I made this Valentine Candy Gift Box featuring Special Delivery


Supplies:
Designer paper
Stitched circle die
Scoring board and bone folder
Adhesive, foam tape or dots
Acetate

Pink card:
(1x) 5.75" x 10.25" (base)
(1x) 3.5" x 8.25" (lid)
(2x) 3.25" x 1.25" (dividers)

Designer paper:
(2x) 6-5/8" x 2-1/8" (base)
(2x) 1-5/8" x 2-1/8" (base)
(1x) 6-5/8" x 2-1/8" (lid)
(2x) 5/8" x 2-1/8" (lid)
(1x) 5/8" x 6-5/8" (lid)

How to:
Score the 5.75" x 10.25" piece of pink card at 1.75" on all 4 sides. 


Score the 3.5" x 8.25" piece of pink card on the 3.5" side at 0.75" and 3", and on the 8.25" side at 0.75" and 7.5" 


On the long side of the 5.75" x 10.25" piece, cut the score lines up to the intersecting horizontal score line. Cut a wedge from each side of the four corner tabs. 


Fold up the corner tabs and apply adhesive to the outsides. Fold them in and adhere to the inside of the adjacent sides to create the box base. 


On the box lid, cut away the end corners from the 1/2" section. On the opposite side, cut up on the score lines to the intersecting line and wedge each side of the corner tabs. 


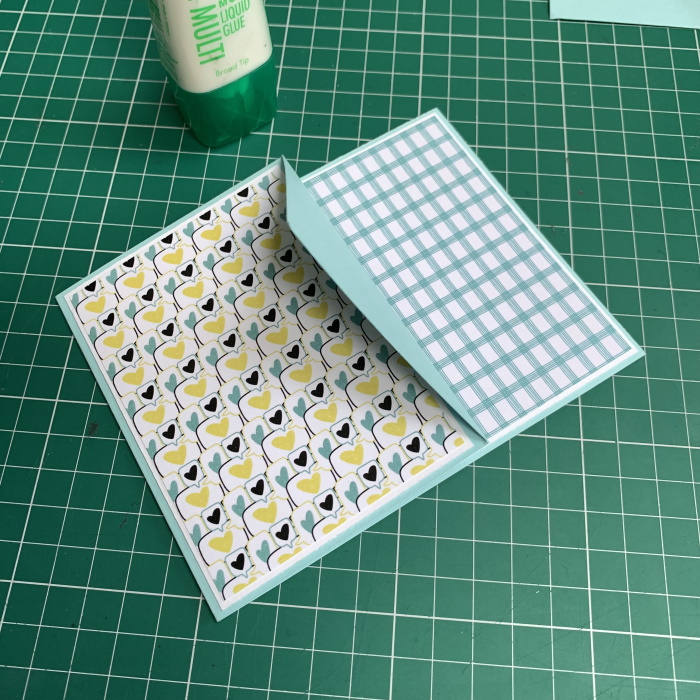
Adhere the papers to the box lid. Taking a 1.75" - 2" stitched circle die, cut away three circles - spaced evenly along the top. 


Apply adhesive the two end tabs, fold in and adhere to make the box lid. 


Cut a piece of acetate approx. 6-5/8" x 2-1/8" and adhere to the inside of the lid. 


Apply adhesive to the 0.5" section. 


Adhere to the box base, making a flip lid. 


Colour thte Special Delivery image and cut around the ouline. 


Stamp the sentiment on a strip of white card. 


Cut 2 circles using the die use for the box lid. 


Adhere the paper circle to the centre circle on the lid, using foam tape. 


Adhere the card circle underneath, inside the box lid. 


Adhere the Special Delivery image to the box lid using foam tape and then add the sentiment beneath it. 


Take the two 3.25" x 1.25" pieces of card and score them at 0.5" and 2.75"


Fold in the 0.5" sections and crease well so they stay folded down


Apply adhesive to each end. 


Slide the dividers into the box and fold out the ends using a stylus or tweezers. Adhere the ends to the sides of the box as shown. 


For more inspiration check out the Stamping Bella Sisterhood page over on Facebook, where you can add your own Stamping Bella creations.

Where you can find me


Thursday, 5 May 2022

Diamond Pivot Card | Stamping Bella

Today I  am sharing how to make a Diamond Pivot Card featuring Special Delivery, one of the newest release stamps from Stamping Bella. This is a very quick and fun card to make and can be used for any occasion. 


Supplies:
Card
Designer paper (used: La-La Land Crafts, Note to Self)
Scoring board and bone folder
Stitched Circle dies

How to:
Stamp Special Delivery onto white card, colour using your preferred medium, then fussy cut around the outline. Set aside. 


Cut card: 
Base - 11" x 4.25"
Inside layers - 5-3/8" x 4-1/8" and 3.25" x 4-1/8"
Card front - 3.25" x 4-1/8"
Pivot panel - 2-7/8" x 2-7/8" and 2.75" x 2.75"
Sentiment panel - 2-7/8" x 2-7/8"


Score the card base on the long side at 2-1/8" and 5.5"


Turn the card 90 degrees so the 2-1/8" score line is at the top. Make a small notch at 2-1/8"


Cut from the 2-1/8" notch, diagonally down to the outside of the 2-1/8" score line, on both sides. 


Valley fold the 5.5" score line and mountain fold the 2-1/8" score line. Crease well with a bone folder. 


Cut paper: 
Inside layers - 5.25" x 4" and 3-1/8" x 4"
Card front - 3-1/8" x 4"
Pivot panel - 2-5/8" x 2-5/8"

Adhere the layers inside the card and on the front. 


Apply adhesive on the front triangle, ensuring to stay away from the edges. 


Adhere the 2-7/8" x 2-7/8" piece of card, leaving a border. then adhere the 2.75" x 2.75" piece on top. Finally, adhere the paper panel down. 


Stamp the sentiment on the 2-7/8" x 2-7/8", using grid paper or craft mat to line up the corners to a diamond shape. 


Cut a circle from card and a smaller circle from paper, adhere them together. Using foam tape, adhere the circle panel to the middle of the diamond shape. Adhere the owl to the circles, also using foam tape. 


Cut some pennants for decoration. 


Adhere the sentiment panel inside, ensuring it is covered when the card is closed. 


For more inspiration check out the Stamping Bella Sisterhood page over on Facebook, where you can add your own Stamping Bella creations.

Where you can find me