Hi everyone. Today I'm sharing a tutorial I had over on the Stamping Bella Blog a couple of weeks ago. I've made a couple more of these cards since and I just love how they turn out. Seriously, give them a try - they are just so much fun to make and they look really great on display.
Curvy Girl Bachelorette Gatefold Easel Card


Supplies:
White card
Designer papers
Scoring board and bone folder
Paper trimmer
Adhesive
Foam tape/dots
Embellishments

How to:
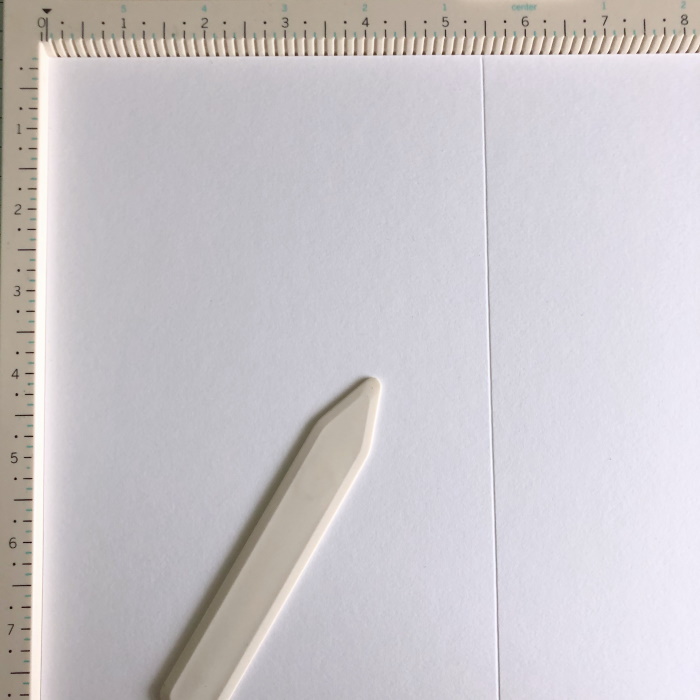
Start with a piece of card measuring 8.5" x 11". Score on the 11" side at 5.5"
Turn 90 degrees and score at 2 1/8" and 6 3/8" on the 8.5" side.
With the card base in the portrait position, cut away the two outer pieces on the top half only.

To ensure the top folds neatly inside the gatefold, trim a shaving off the outer edges of the centre piece - approx 1/16" from each side.

Score the top section at 2.75", as shown

Fold in both sides and crease with a bone folder

Fold the top section in half and crease with a bone folder.

Cut one piece of white card measuring 4 1/8" x 5.5". (If you cut more than 1/16" off each side, measure across the top section of the card and cut one piece of white to that width, and 5.5" long. The width will depend on how much of a shaving you trimmed off.)
Cut another piece of card measuring 4" x 5 3/8" and a piece of paper measuring 3 7/8" x 5.25"

Adhere all three pieces together.

Apply glue to the bottom half of the easel and adhere the front panel.


For the inside and outside of the gatefold side flaps, cut four pieces of white card measuring 2" x 5 3/8" and four pieces of paper measuring 1 7/8" x 5.25". Adhere a piece of a paper to each of the card pieces.
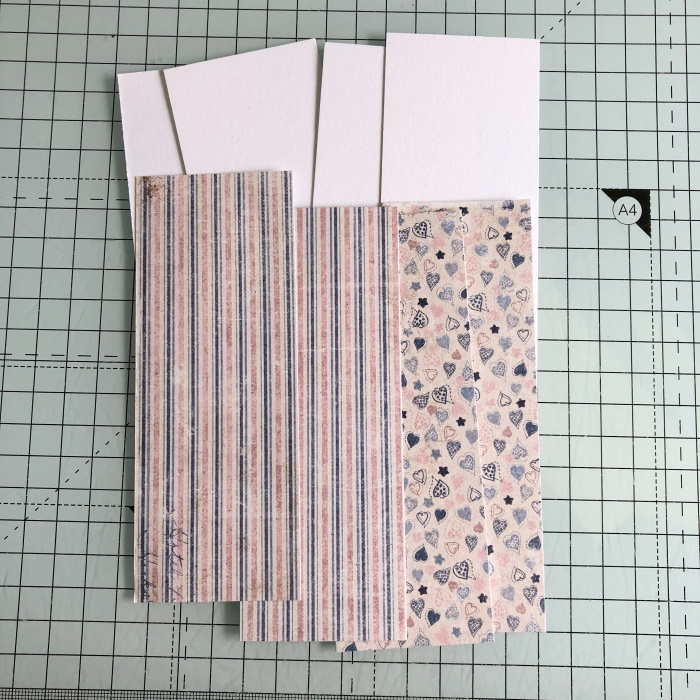

Adhere the panels to the inside and outside of the gatefold. Set the card base aside.


Stamp Curvy Girl Bachelorette onto a piece of white card and colour using your desired medium.


Fussy cut the image, or use the coordinating CUT-IT-OUT die

Cut the middle size Celebrate Sentiment from white card.

Stamp the sentiment onto white card and cut out using a rectangle die.

Adhere the sentiment on the inside bottom of the card base, just beneath where you want the front to stand. The front panel sits behind the sentiment, which holds it open.

Decorate the front of the easel as desired. Adhere the image using foam tape that isn't too thick, as the gatefold needs to close over it.

Cut a strip of card measuring 10" x 1.75". Centre it across the front of the card and then gently fold it around. This is the best way to ensure the belly band fits properly.

Apply double sided tape on the inside of one end, and the outside of the other end. Remove the tape liner and fold the belly band, securing the ends at the back.

Cut two pieces of paper measuring 4.25" x 1 3/8", and adhere to the front and back of the belly band.


Cut a white card scalloped circle measuring 2" in diameter, and a designer paper stitched circle measuring 1/75" in diameter. Adhere together.

Adhere the circle to the front of the belly band and then add the Celebrate cut out.

Slide the belly band onto the closed card.

To display the card slide the belly band off, open the gatefold, and pop up the easel.


