Pages

Thursday, 10 December 2020

Penguin Pull-up Candy Wrapper | Stamping Bella Tutorial

Hi all!! Today I'm sharing the cutest little Penguin Pull-up Candy Wrappers featuring Snowsuit Penguins, Penguin Family and Holiday sentiments from Stamping Bella Stamps


Supplies:
Christmas themed papers
Scoring board and bone folder
Double sided tape (1/4")
Hole punch
Ribbon
Candy bars (1.5" wide x 5.75" tall)

How to:
Stamp a selection of penguins from Snowsuit Penguins and Penguin Family - you need one for each wrapper. 
Colour the images using your preferred medium 


Fussy cut around the outline of the images, using a precision scissors. 


For each wrapper cut a scalloped circle, approximately 2" in diameter, from white card, and a stitched circle, approximately 1.75" in diameter, from designer paper. 


Adhere a stitched circle to each of the scalloped circles. 


Using foam tape, adhere one penguin to each of the circle panels. 


For each candy wrapper, cut a piece of paper measuring 4.25" x 6.5". 


Score on the 4.25" side at 1.5" and 3.25" 


Apply a strip of tape on the inside, across the bottom of the centre panel and the 1" panel. Also apply a strip of tape up along the side of the 1" panel.  


Fold in the 1.5" panel first, Then fold the 1" panel over it. 


Score three lines across the bottom - at 1/8", 1/4" and 3/8" to create the candy wrapper look. 


Punch a hole at the top, in the centre


Thread a ribbon through the hole, front and back. You will need approx 20" for each wrapper. 


Slide the candy bar in, and it will push the ribbon down inside the wrapper. 


Tie the ribbon in a knot at the top, or using twine to secure it. 


Adhere one of the circle panels to the front of each wrapper. 


Stamp the For You sentiment from the Holiday sentiments and adhere beneath the image. 
Pull the ribbon upwards to reveal the candy bar. 


For more inspiration check out the Stamping Bella Sisterhood page over on Facebook, where you can add your own Stamping Bella creations.


My Social Media Sites


Friday, 4 December 2020

A Gift From Yeti | Stamping Bella Bellariffic Friday

Happy Friday!! Today I am sharing my Stamping Bella Bellariffic Friday card.
Our theme this week is

Stamp of the Month

The stamp of the month for December is A Gift From Yeti and the whole Design Team is showcasing this stamp over on the Bella Blog. You can grab it at 50% off for the whole month, while stocks last. 

I made a little gift box and the added a sentiment from the Yeti Sentiments set. 


Copic Markers used:
Yeti - BG01, BG53, BG45, BG57. C3, C5, 0
Gift - R81, R83, R85, BV000, BV01


Other Products used:
Stitched Circle Dies
Scalloped Circle Dies
Winter Themed Papers
White Gel Pen

For more inspiration check out the Stamping Bella Sisterhood page over on Facebook, where you can add your own Stamping Bella creations.


My Social Media Sites


Thursday, 3 December 2020

Sloth in a Stocking Layered Lollipop Card | Stamping Bella Tutorial

Hi everyone! Today I'm sharing a Sloth in a Stocking Layered Lollipop Card tutorial featuring Sloth in a Stocking rubber stamp and Merry Slothmas Sentiment set


Supplies: 
White card
Christmas themed papers
Scalloped and stitched circle dies
Paper straw
Scoring board and bone folder. 


How to: 
Stamp the Sloth in a Stocking onto white card and colour using your desired medium. 


Fussy cut around the outline using a precision scissors. Set the image aside. 


Cut two strips of paper measuring 12" x 1", and two strips of contrasting paper measuring 12" x 1.5" 


On one side of each strip, score at every 1"


Flip the paper over and score at every 0.5"


Mountain valley fold all the strips. 


Adhere the two 1.5" wide strips together on one end, and also adhere the 1" strips together.


Adhere the ends of each strip together. 


For the front of the lollipop, cut a 4" scalloped circle from white card, a 3.75" stitched circle from red paper, and a 3.5" stitched circle from paper. For the back of the lollipop, cut a 3.75" circle. 


On the circle for the back, apply a generous amount of wet glue to the inside. 


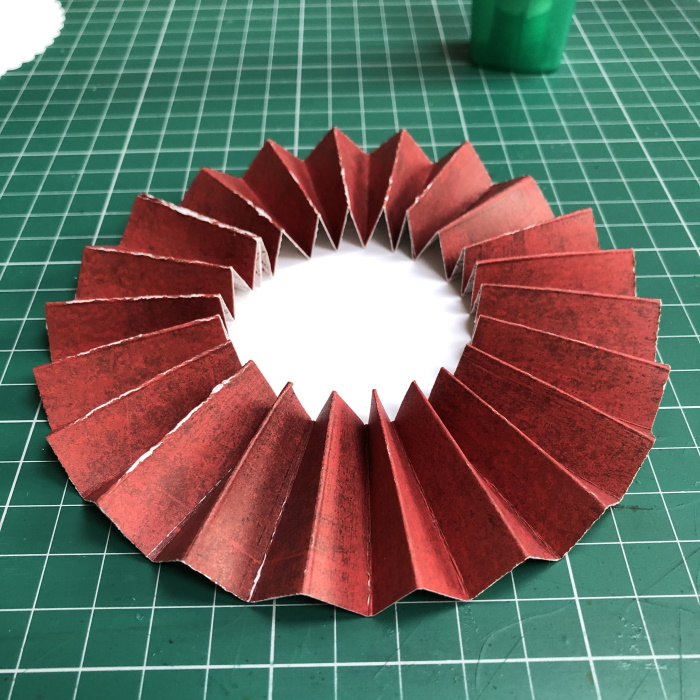
Fold the 1.5" wide strip inwards onto the stitched circle to create the rosette shape. Hold in place until the glue dries enough to hold it. 


Layer the 1" wide strip on top of the 1.5" strip leaving a border all round the edges. 


Insert the straw between the rosette and the back circle. Adhere in place. 


Adhere the front layers together. 


Adhere the circles on top of the rosette. 


Create some snow hills (optional)


Adhere the 'snow' to the front. 


Using foam tape, adhere the Sloth in a Stocking on the front. 


Stamp the sentiment from the Merry Slothmas Sentiment set on to a strip of card.


Adhere the sentiment across the top. 


Tie a bow at the top of the straw, under the rosette.


The December stamp of the month is A Gift from Yeti. You grab this awesome stamp at 50% off for the whole month of, while stocks last.

For more inspiration check out the Stamping Bella Sisterhood page over on Facebook, where you can add your own Stamping Bella creations.

My Social Media Sites