Pages

Thursday, 27 April 2023

Oddball Fairytale Princess Lift & Reveal Box

Hi all! I'm back with another Stamping Bella tutorial and today I'm sharing how I made this Lift and Reveal Princess Gift Box featuring one of the newest release stamps Oddball Fairytale Princess


Supplies:
White card
Designer paper
Scoring board and bone folder
Pencil, ruler, scissors and craft knife
Magnets
Adhesive
Embellishments

How to:
Cut white card
(1x) 12" x 12"
(1x) 12" x 6" - trim approx. 1/16" from the length and width
(1x) 6" x 4" 

Paper panels:
(6x) 5.75" x 2.75"
(2x) 2.75" x 2.75"
(2x) 0.75" x 5.75"

Score the 12" x 12" piece of card at 3", 6", and 9". Turn 90 degrees and score at 3" and 9" 


Score the 6" x 4" piece of card at 1" on the 4" side 


Trim the the 12" x 6"  piece of card to remove approx 1/16" from the length and width. Score at 3" on the 6" side. On the long side score at 3" then turn 180 degrees and score at 3" (as the piece is slightly smaller than 12", it must be scored from each end to ensure both end pieces are 3")


On the 12" x 12" piece, cut up on the 3", 6" and 9" score lines until it meets the intersecting score line. Repeat on the opposite side. 


Fold in the side pieces of the second section, apply adhesive, then adhere the outside pieces of the third section to it. 


Remove the outer sections on the fourth 3" section. 


Apply adhesive to the inside of the outer flaps on the front section, fold up and adhere to the outside of box. 


Take the 12" x 6" piece and fold the score lines, with the short side closest to you. Adhere paper panels to the centre sections. 


On the shorter section cut two 1/8" wide slits approx. 0.5" in from each side and centred, using a craft knife. This is for threading ribbon through to hold a gift or gift card. 


Fold in the 3" sections on the top apply adhesive then adhere to the inside of the 3" section on the other half. 


Cut up each side diagonally


Open up the 6" lid of the box, apply adhesive to the inside, then adhere the reveal mechanism to the inside of the lid, as shown. 


Fold downwards to ensure the reveal mechanism fits into the box when closed. 


Take the 6" x 4" piece and fold/burnish the 1" score line. Round the corners of the 1" section. 


Apply adhesive to the 3" section and adhere to the outside of the box lid, with the 1" section forming the front closure. 


Adhere two magnets to the inside of the 1" flap and line them up with magnets on the front of the box. 


Once the magnets are lined up and stuck down, cover them with paper panels. Adhere any remaining paper panels to the outside of the box. 


Stamp Oddball Fairy Princess onto white card and colour using your preferred medium. 


Cut out using a narrow stitched rectangle die then add a mat layer behind it. 


Adhere to the lid of the box, adding embellishments. 


For more inspiration check out the Stamping Bella Sisterhood page over on Facebook, where you can add your own Stamping Bella creations.

Where you can find me


Thursday, 30 March 2023

Gnome Chef Recipe Box | Stamping Bella

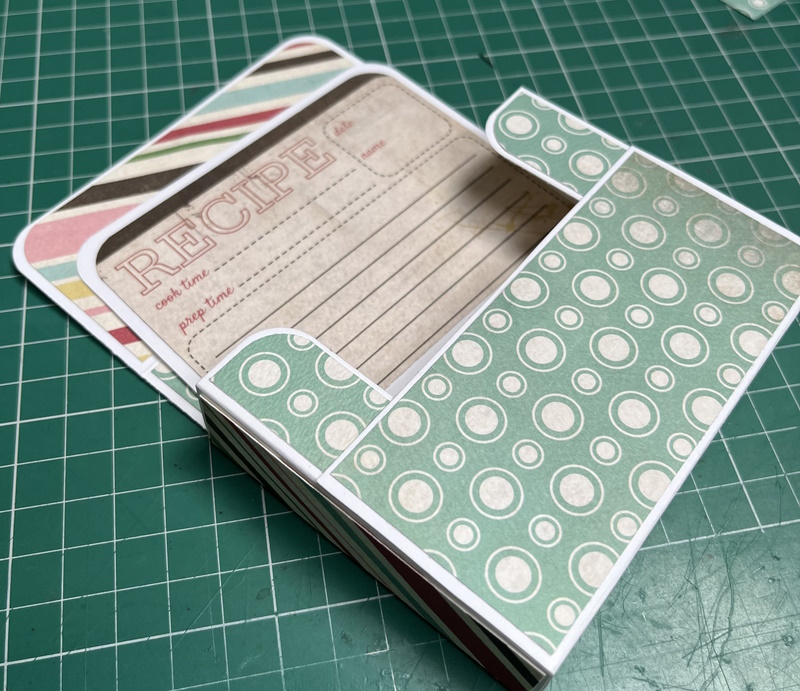
Hi everyone! Today I'm sharing how I made this Flip Top Recipe Box featuring Gnome Chef from our January 2023 release. 

This cute box measures 4.25" wide x 3.25" tall and the recipe cards are 4-1/8" x 3.25"


Supplies:
White card
Designer papers
Scoring board and bone folder
Adhesive
Magnets or low profile velcro dots
Circle dies
Scalloped circle dies

Cut card:
(1x) 9" x 7-7/8" (box)
4-1/8" x 3.25" (recipe cards)

Cut paper:
(4x) 1-7/8" x 4-1/8"
(3x) 0.75 x 4-1/8"
(4x) 3-1/8" x 0.75" 
(2x) 3-1/8" x 4-1/8"


How to:
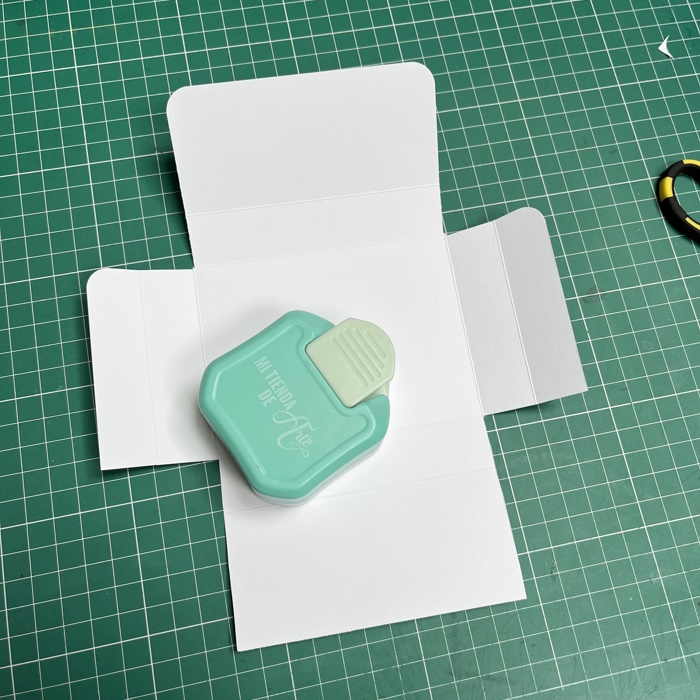
Score the 9" x 7-7/8" piece of card at 7/8" and 1.75" from each end, on the 7-7/8" side
Turn 90 degrees and score at 2" and 2-7/8" from each end, on the 9" side. 


Fold and burnish the score lines. 


Cut away the 4 outer sections as shown. 


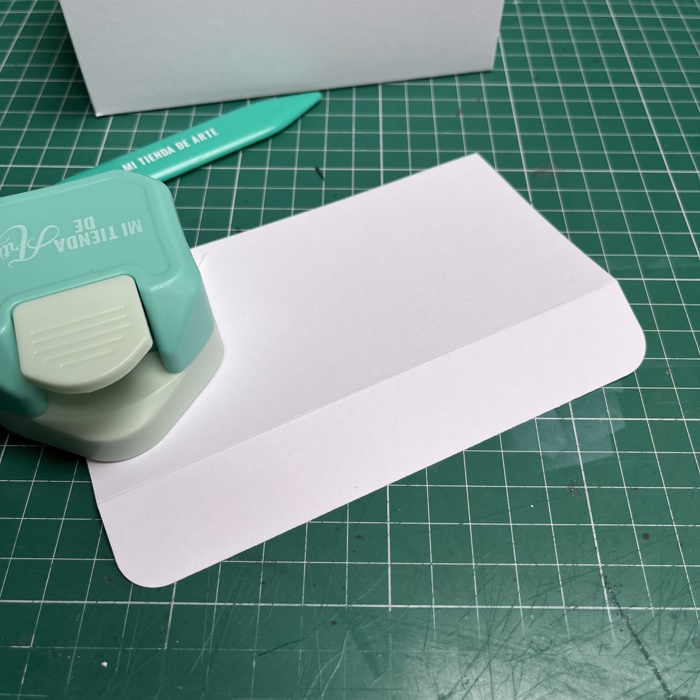
Round the corners on one end, and also the top of the side tabs. These will all be facing upwards. 


Grab 2 magents and stick them together. Apply a strong glue dot to one magnet and adhere it to the inside of the box flap (with the rounded corners)


Apply adhesive to the other magnet. Fold up the bottom on the outer score line. Then fold down the top at the inner score line. This will position the magnet on the bottom section. Press firmly to secure the magnet, then open up the top. 


Round the corners of 2 of the 1-7/8" x 4-1/8" pieces, for inside and outside of the front flap. Adhere paper over the magnets. 


Round the outer corners on 2 of the 3-1/8" x 0.75" pieces of paper. These will go on the side pillars at the box front. 


Adhere one of the 3-1/8" x 4-1/8" pieces of paper in the centre on the inside, and adhere the second rounded corner piece inside the top flap. 

Apply adhesive inside the box front (no rounded corners) 


Adhere the front to the side pillars ensuring the edges are lined up. 


Adhere one of the 0.75 x 4-1/8" to the inside spine. 


For each recipe card, take a 4-1/8" x 3.25" piece of card and decorate the front using designer paper or note paper. Alternatively, you can use journaling pens to doodle a design. 


Stamp Gnome Chef onto white card, colour and then cut out using a 3" circle die. Cut a 3.25" scalloped circle and adhere the image to it. 


Apply adhesive to the top half of the scalloped circle and adhere the image down onto the top flap of the box. 


For more inspiration check out the Stamping Bella Sisterhood page over on Facebook, where you can add your own Stamping Bella creations.

Where you can find me