Pages

Showing posts with label Birthday Card. Show all posts

Thursday, 6 February 2025

Curvy Girl Birthday | Stamping Bella

Hi all, today is my birthday so I made a birthday card for myself using my favourite colours, techniques, craft supplies and, of course, one of my favourite stamps - Curvy Girl Eats Cake


My favourite colours for cardmaking are pink and teal. 
Dress and shoes  - BG11, BG13, BG45, BG53, BG57
Flowers - R30, R32, R35


Plate: BV11, BV13
Cake: E51, E53, E55, R30, R32, R35
Leaves: G20, G21, G24
Shadow: W00, W1, W3


A favourite technique of mine is to use a scoring board and stylus to create a frame around the image. I do this by turning the image face down and scoring on the 1/8" line on all four sides. 


The teal, mint and pink papers are a mix from various different brands. 


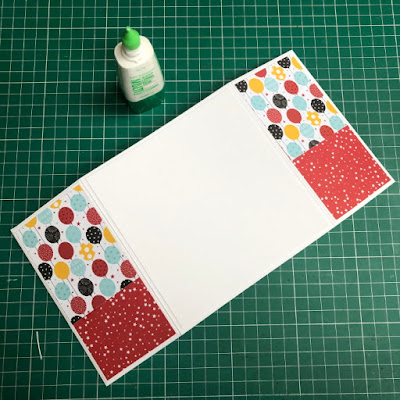
My next favourite thing is to decorate the inside of the card. This does add a lot of weight to the card and is more expensive to mail but I just love the finished look. 


I also added a place to hold a gift card - who doesn't love gift cards?? 


On the card front I stuck down the card and paper layer. 


Then I used strips of contrasting paper and adhered them to the back of the image, before gluing that down onto the paper base layer. 


Finally, my favourite embellishment - enamel dots. I have these in just about every colour there is; you could almost say I have an obsession with them! 


And here is the finished product! All of my favourites on one card. Happy Birthday to me!


For more new release inspiration check out the Stamping Bella blog and Stamping Bella Sisterhood page over on Facebook, where you can add your own Stamping Bella creations.


Where you can find me

Friday, 26 February 2021

BIG Birthday Wishes | Stamping Bella Bellariffic Friday

Happy Friday!! Today I am sharing my Stamping Bella Bellariffic Friday card.
Our theme this week is

Newest Release Showcase

My card features Oddball Sugar Plum Fairy and I've used the Birthday Sentiments


Copic Markers:
Skin - E04, E11, E00
Hair - E50, E51, E53, E55, E33
Dress/Shoes/Bow - R81, R83, R85
Wand - Y15, Y19, C1, C3


Other Products Used:
Card - Papermilldirect.
Paper - Authentique
Double Stitched Rectangle Die
Scalloped Border Die

The November stamp of the month is Oddball Cupid. You grab her at 50% off for the whole month of, while stocks last.

For more inspiration check out the Stamping Bella Sisterhood page over on Facebook, where you can add your own Stamping Bella creations.

My Social Media Sites
   

Thursday, 18 February 2021

Oddball Geek Pop Out Card | Stamping Bella Tutorial

Hi all. Today I am sharing how I made this  Pop Out Card featuring Oddball Geek. I saw a die recently that was designed to make this card and just by looking at the die I could see it would be an easy card to make by hand. There is a little bit of cutting for the layers, but the base of the card is simple scoring and folding. 


Supplies:
Card
Papers
Circle dies
Scoring board and bone folder

How to:
Stamp Oddball Geek twice, onto white blending card. Stamp the sentiment onto a strip of card. 
Colour one of the images, and just the laptop from the other image. 

Cut out Oddball Geek using a circle die or punch


Cut the image out using a circle die, and a cut a larger paper circle layer. 
Set the image and the sentiment aside. 

For the card base:
Cut 2 pieces of white card measuring 11" x 5.5" 
Score both pieces on the 11" side at 2.75" and 8.25" 

One ONE of the 11" x 5.5" pieces, make a notch at the 5.5" at the top and bottom, on the 11" side. 


Score from each of the outer corners, diagonally, to the 5.5" marks. 

Mountain fold the 2.75" and 8.25" score lines, and valley fold all the diagonal score lines. 


Fold in the outer panels and crease all the score lines. 


On the back of the folding mechanism, apply adhesive on the centre panel and the 2 outer large triangles. 


Adhere the front folding mechanism to the back piece of the card base. 


For the layers, cut:
2x   3.75" squares of card
2x    3.5" squares of card
2x   2 5/8" x 5 3/8" pieces of card
1x   5.25" square (back of card - optional)

Cut one of the 3.75" pieces diagonally
Cut both 3.5" pieces diagonally both ways to make 4 triangles. 

1x   3.5" pieces of paper
2x   3.25" piece of paper
2x   2.5" x 5.25" piece of paper (and extra layers to decorate)

Cut the 3.5" pieces diagonally
Cut both 3.25" pieces diagonally both ways to make 4 triangles. 


Adhere all the paper pieces to the card pieces and then adhere them to the card front and back. 


Cut a 3.5" square and a contrasting 3.25" square to layer into the centre diamond. 


Adhere the layered sentiment into the centre. 


To create a belly band, cut a piece of card measuring 2.75" x 11.75" (this is the length of an A4 sheet of card).
Centre the card strip over the card and bend around to the back. They should slightly overlap. Apply adhesive to the end that overlaps and adhere it to the other end. 


Cut a piece of paper measuring approx. 5.5" x 2.5" for the front and back of the belly band. 


Cut a piece of red paper larger than the image. Adhere the image to the circle using 3D foam dots/tape. Use foam dots to adhere the 2nd laptop over the first one, to add extra dimension to the card. 


Apply adhesive to the back of the image, just where it will sit on the belly band and stick it down. 


Slide on the belly band 


Decorate as desired. 


The stamp of the month for February is Oddball Cupid and the whole Design Team is showcasing this stamp over on the Bella Blog. You can grab it at 50% off for the whole month, while stocks last. 

For more inspiration check out the Stamping Bella Sisterhood page over on Facebook, where you can add your own Stamping Bella creations.

My Social Media Sites