Hi all :) Today I'm sharing how I made this Tower Fold Card. I've used Stamping Bella's Guinea with a Key, which was release a few months ago but I'm only getting to use it now. Isn't it adorable??! This card is such a simple card to make and can be adapted to suit any occasion.


Supplies:
Guinea with a Key rubber stamp (sentiment included)
Pink card, white card
Designer paper
Scoring board, bone folder, stylus, pencil, ruler, eraser
Stitched circle and scalloped circle dies
Adhesive and foam tape/dots
How to:
Stamp the Guinea image onto white card. Colour using your preferred medium then set the image aside to work on the card.


Card base:
Pink card -
(1x) 5.75" x 8.25"
Card layers:
White card -
(4x) 7/8" x 5-5/8" (side panels, back and front)
(2x) 7/8" x 4-1/8" (top and bottom front panels)
(1x) 1-5/8" x 4-1/8" (centre front panel)
(1x) 2-1/8" x 5-5/8" (back centre panel)
(2x) 3" x 3" (front diamond panels)
Paper layers:
(4x) 0.75" x 5.5" (side panels, back and front)
(2x) 0.75" x 4" (top and bottom front panels)
(1x) 1.5" x 4" (centre front panel)
(1x) 2" x 5.5" (back centre panel)
(2x) 2-7/8" x 2-7/8" (front diamond panels)


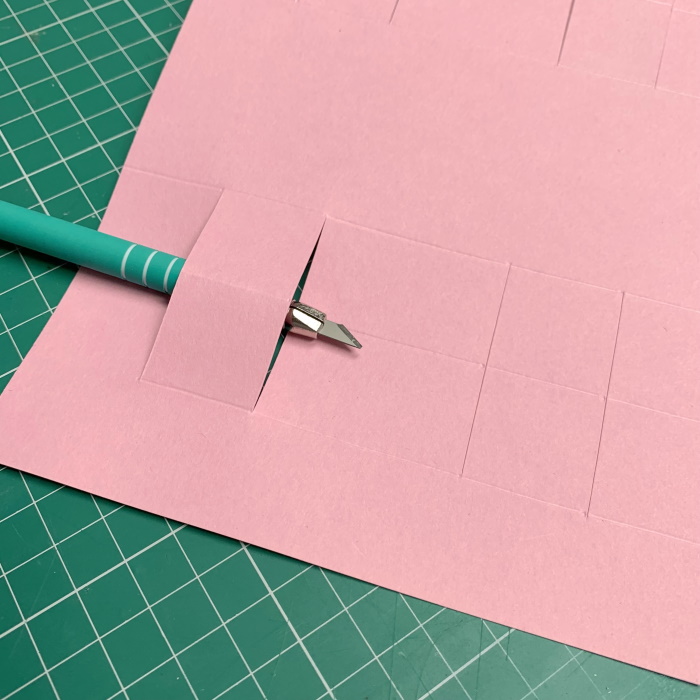
On the 1" marks, cut across from the 1" score line to the 3" score line, and from the 5.25" to the 7.25" score lines. Repeat at the 2" mark.

To fold the scored/cut sections start at the top and mountain fold, then valley fold the next one, then mountain, valley and finally mountain. Try not to fold the inner score line on the valley fold sections.


... and back.

Adhere down the paper layers. The centre section at the back is for writing a greeting, there is no paper layer.


Cut the image out using a stitched circle die. Cut a larger stitched circle from pink card and then a larger scalloped circle from white card. Adhere them together.

Turn the square at an angle, line up the side points to the top edges of the centre middle section, and adhere down. Repeat with the second diamond, lining the side points up with the bottom of the middle front section.


Stamp the sentiment onto a strip on white card and cut out using a ribbon label die. If you don't have a die, fishtail the ends of a 0.75" x 3.75" strip of card with a scissors.

Adhere the sentiment to the bottom front section.

For more inspiration check out the Stamping Bella Sisterhood page over on Facebook, where you can add your own Stamping Bella creations.
Where you can find me


1 comment:
So pretty and creative card lovely layout and image x
Post a Comment