Pages

Showing posts with label tiny townies. Show all posts

Thursday, 26 August 2021

Triple Tier Card with Stand | Stamping Bella Stamps

Hi all! Today I'm sharing how to make this Triple Tier Card with an optional Stand featuring Tiny Townies on Santa's Lap and a sentiment from the Holiday Sentiments stamp set. 

There are loads of samples of this type of card going around, but my version makes a 5.5" x 5.5" card when closed up, and there is also a gift card holder on the top tier of the card for that extra little surprise.  It is quite bulky so would need to be mailed in a bubble envelope or box envelope, but it's a fantastic display card well worth the extra postage costs. 


Supplies:
Designer paper (used Modascrap: Christmas)
Circle and Scalloped Circle Dies
Pencil and ruler
Scoring board and bone folder
Craft knife

How to:
Stamp Tiny Townies on Santa's Lap onto white card. Stamp the sentiment from Holiday Sentiments onto a piece of designer paper measuring 4.75" x 4.75" - positioning it towards the top. 


Colour the image and fussy cut around the outline using a precision scissors. 
Set the image aside. 


Cut a piece of card measuring 11.5" x 5.5" and score on the long side at 5.5" and 11" (bottom tier)


Cut a piece of card measuring 10.5" x 5" and score on the long side at 5" and 10" (middle tier)


For the panels and sliding mechanism, cut white card:
5-3/8" x 5-3/8"
4-7/8" x 4-7/8" 
0.25" x 7" (x2)

For the top tier of the card cut one piece of card measuring 4.5" x 4.5" 


If you want each tier to have approx 0.5" showing when the card is closed, follow the two steps below. 

Take the bottom tier card piece and, with the 0.5" section on the right, measure down 0.5" on the left side section. Draw a line across. Across the top, place a pencil mark at 1.5" and 4" and draw a line from top to bottom. Measure up 1.5" and draw a line across. 


Take the middle tier card piece and, with the 0.5" section on the right, measure down 0.5" on the left side section. Draw a line across. Across the top, place a pencil mark at 1.25" and 3.75" and draw a line from top to bottom. Measure up 1.5" and draw a line across. 


If you would prefer the tiers to be tucked completely inside each other when the card is closed, move the bottom line down 0.5" on each piece. 


Using a craft knife, cut each side of the pencil line, from the 0.5" horizontal line to the first or second horizontal line, depending on whether you want the tiers hidden. On this sample I went to the bottom line so that the tiers were completely inside one another. 


Take the 0.25" x 7" piece of card and slip in under the centre section. Loosely fold it around and trim if necessary. Glue the ends together. 


Repeat for both piece of card. 


Take the 4-7/8" x 4-7/8" piece of card and apply DS tape around the edges. Fold the middle tier on the 5" score line so that the outside is showing. Apply a strip of DS tape each side of the sliding mechanism. Remove all the tape backing and adhere the panel down. Repeat with the bottom tier, using the 5-3/8" x 5-3/8" piece of card. 


Adhere the paper with the sentiment onto the front of the middle tier and set aside. 


For the top tier, cut a piece of designer paper measuring 4.25" x 4.25" and adhere to the 4.5" square piece of card. If you want to add a gift card holder, measure the size of the gift card and then add 1-1/8" extra to the width, and 0.5" extra to the length. Score on each long side and the bottom at 0.5" 


Using a small circle die, cut a semi-circle from the top of the gift card holder. 


Apply adhesive to the 0.5" sections and adhere the holder down onto the top tier, ensuring it's towards the bottom. 


Apply 1/4" tape, or wet glue, to the sliding mechanism on the middle tier. Push the mechanism right down to the bottom of the runner.


Line the top of the top tier up with the top of the middle tier, centered horizontally across the card, and adhere it to the sliding mechanism. 


Before closing up the middle tier, add a pull tab, or punch a hole and add some twine. 


Apply DS tape to the outside of the 0.5" section and lift the backing on one end. Fold the middle tier over and adhere the 0.5" section to the opposite end, ensuring it's behind the top tier. 


Repeat the steps above to attach the middle tier to the bottom tier. 


Cut layers and panels for the front of the card, and adhere them all together. 


Adhere the circle panel down using foam tape and then adhere the image on top using more foam tape.


Decorate the front as desired. 


Optional Stand.
This card is designed to lay flat but if you want to create a stand to display it upright, cut a piece of card measuring 4.5" x 9.5". Score on the long side at 3.5", 7", 8" and 9". 


Mountain fold the 8" score line and valley fold all of the others. 


Apply adhesive to the outside of the 0.5" section and adhere to the other end. 


Line up the bottom of the stand with the bottom of the back of the card and adhere. 


Decorate each of the tiers using the elements page from the paper pack. 


For more inspiration check out the Stamping Bella Sisterhood page over on Facebook, where you can add your own Stamping Bella creations.

My Social Media Sites


Friday, 12 February 2021

You Are So Sweet | Stamping Bella Bellariffic Friday

Happy Friday!! Today I am sharing my Stamping Bella Bellariffic Friday card.
Our theme this week is

Vintage
(any stamp not from the newest release)

My card features Tiny Townie Sammy is Sweet.


Copic Markers used:
Skin - E00, E04, E11, E21
Hair - E71, E74, E77, E79
Dress/Shoes/Gift - RV91, RV93, RV95, RV99
Tights - C9, C1
Cupcake/Candy - R21, R22, E32. E51, E53. 
Shadow - W1, W3, 0


Other Products used:
Double Stitched Rectangle Dies
Paper - Piatek Trzynastego
Card - Papermilldirect

For more inspiration check out the Stamping Bella Sisterhood page over on Facebook, where you can add your own Stamping Bella creations.

My Social Media Sites


Thursday, 4 February 2021

Tiny Townie Criss Cross Card | Stamping Bella Tutorial

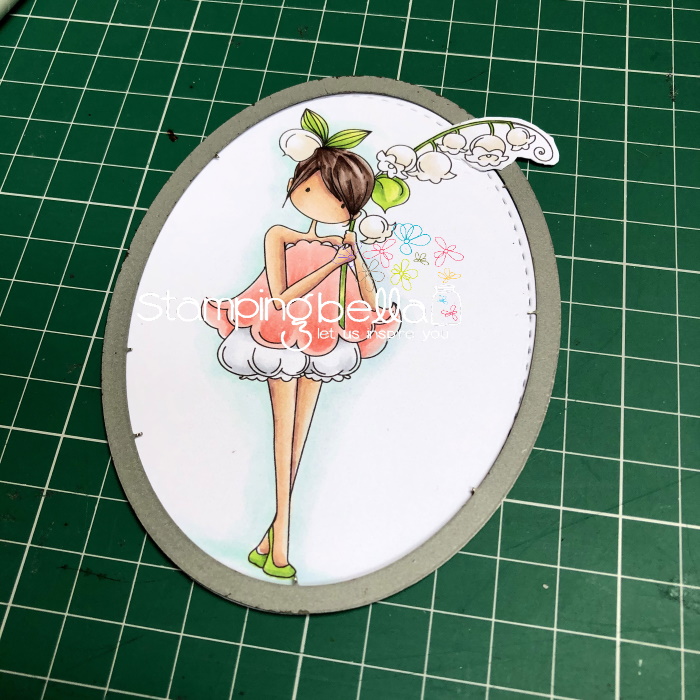
Hi all, today I'm sharing how I made this Tiny Townie Criss Cross Card. The stamp I've used is Garden Girl Lily of the Valley 


Supplies: 
Card
Papers
Scoring board and bone folder
Paper trimmer
Dies: - Stitched Tags, Scalloped Border, Stitched Oval and Scalloped Oval
Adhesive 
Ribbon or twine. 

How to: 
Stamp Garden Girl Lily of the Valley onto white card and colour using your preferred medium. 


Cut out using a stitched oval die, leaving the flower stem over the die so that it doesn't cut it off. 
Set the image aside to make the card. 


Cut one piece of card measuring 8" x 11.75". On the 8" side, score at 4"


On the 11.75" side, cut in half (5 7/8")


Adhere the 2 pieces together to form 3 panels. 


From the inner score lines, cut diagonally out to the bottom corners. 


Trim down the pieces you cut off, to make layering panels for the front. 


Cut a piece of paper 5.25" x 3.5" and cut it diagonally to make paper layers for the front. You may need to cut 2 pieces if you're using double sided paper, but make sure to cut the diagonal from the opposite corner. 

Cut another piece of paper 3 7/8" x 5 5/8" for the inside centre panel. 


Adhere down all the layers. 


Cut a piece of card measuring 2" x 8.5". Centre it over the card and fold the end around to the back. Apply some adhesive to one end and adhere it over the other end to make a belly band, 


Cut two pieces of paper 1 7/8" x 4" and adhere to the front and back of the belly band. 


Cut out a tag large enough to fit in the card base. Cut a selection of embellishments and borders


Adhere the borders to the inside of each diagonal cut, trimming as necessary. 


When the borders are stuck down, apply a strip of glue across the bottom of one side piece and adhere to the centre panel. 


Apply adhesive to the bottom of the other side panel, and a litte bit up the side, being careful not to go too high, fold in the panel and adhere down. 


Slide on the belly band to ensure it fits. 


Cut a scalloped oval larger than the oval used for the image and adhere the image to it. Adhere the image to the belly band only. You could remove the belly band first if preferred. 


Decorate the tag and stamp one of the Garden Girl Flower Sentiments.


Inset the tag into the card base. 


For more inspiration check out the Stamping Bella Sisterhood page over on Facebook, where you can add your own Stamping Bella creations.

My Social Media Sites