Pages

Showing posts with label Triple Tier Card. Show all posts

Thursday, 15 September 2022

Thanksgiving Oddball | Stamping Bella

Hi all. Today I'm sharing how I made this Triple Tier Slider Card featuring Thanksgiving Oddball. It's hard to believe we're into September and thinking about Thanksgiving and Christmas already. The summer months just flew by. I am welcoming cooler temperatures and amazing autumnal colours but the darker mornings and evenings are not something I am fond of. 

The papers I used on this card are Carta Bella's Homemade with Love. They are quite old at this point, but I recently found them online and bought them again. I love them for all things food related.  


Supplies:
Card
Papers (used -  Carta Bella)
Scoring board and bone folder
Pencil, ruler, eraser
Dies used - Postage Stamp, Pierced Oval, Pierced Rectangle. 

How to:
Stamp Thanksgiving Oddball onto blending card, colour and fussy cut around the outline. Use a craft knife to cut pieces the pieces the scissors can't reach. Set aside to work on the card. 


Cut:
White card:
Tiers: 4.5" x 11-3/8", 3-1/8" x 10.25", and 3" x 3"

Paper:
Large tier:  4-3/8" x 3.75"
Middle tier: 3.25" x 3"
Small tier: 2-7/8" x 2-7/8"
Slider mechanisms (x2): 0.5" x 4" 

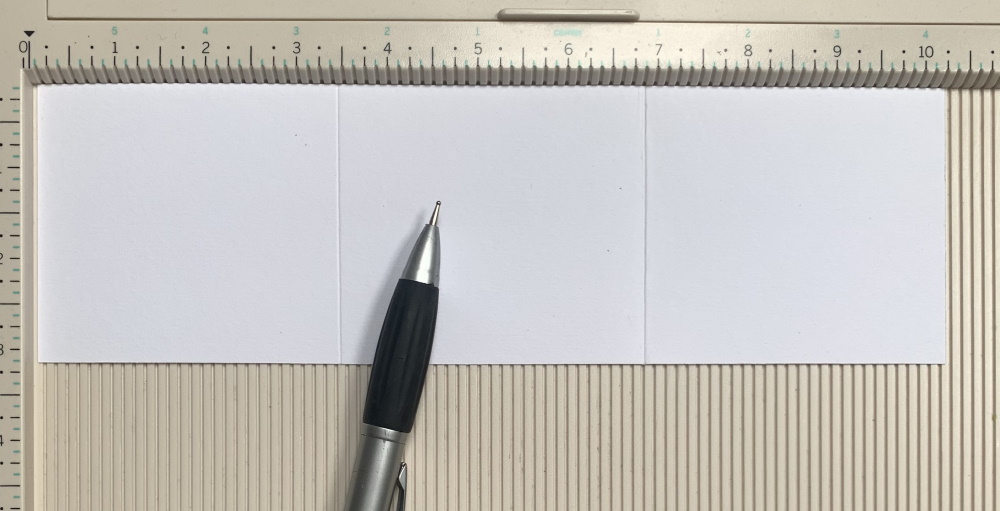
Score the 4.5" x 11-3/8" piece at 3-7/8" and 7.75"


Score the 3-1/8" x 10.25" piece at 3-3/8" and 6.75"


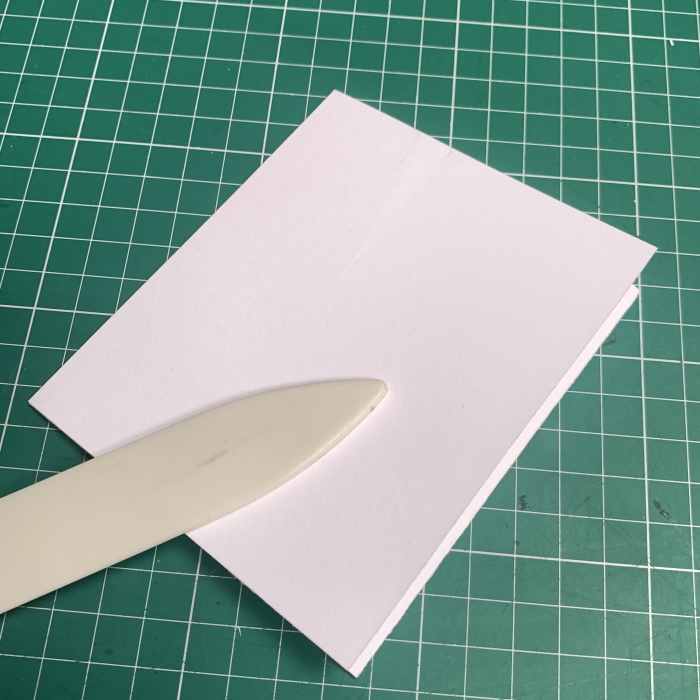
Fold in the right side on the score line, then fold the left side on top. Crease well with a bone folder. 


Open out the card pieces. On the inside right section of the larger piece, measure in 1" from the 7.75" score line, and the outside edge. At the 1" marks, measure down 0.75" from the top and draw a line down to 3.5" 


On the smaller piece, repeat the step above, measuring in 1" from the score line and outside edge, but measure down from the top and draw a line from 0.25" to 2.5"


Use a craft knife to cut each side of the lines, making slits approx. 1/16" wide. 


Fold up the pieces again and adhere the paper layers to the front of all three layers


Take the two 0.5" x 4" pieces of paper 


Slide the pieces through the slits 


Fold around the card between the slits, not too tightly, and glue the ends together to make the sliding mechanisms. Push the sliding mechanism of the middle tier down to the bottom and apply adhesive to it. 


Take the smallest tier and centre it horizontally, adhering it so that approx 1/8" protrudes at the top. 


Apply adhesive to the inside of the left side, fold in the right side, and then fold the left side down on top of it. 


Repeat the sliding mechanism steps with the large tier, adhering the middle tier to the mechanism but keeping the top flush with the top of the large tier. 


Fold up the  large tier to complete the card base. 


Create a front panel using a postage stamp and rectangle die. 


Stamp the sentiment onto white card and cut out with an oval die. While the die is still in place ink with Antique Linen distress oxide ink. 


Adhere both Thanksgiving Oddball and the sentiment oval to the front panel using foam tape/dots. 


Punch a 1.5" circle from designer paper. Fold in half and cut across the crease line. 


Adhere the half circles each side of the top tier to create a pull tab. 

Decorate the tiers, adding a place to write a personal message on the middle tier. A gift card can be added to the top tier. 


For more inspiration check out the Stamping Bella Sisterhood page over on Facebook, where you can add your own Stamping Bella creations.

Where you can find me


Thursday, 26 August 2021

Triple Tier Card with Stand | Stamping Bella Stamps

Hi all! Today I'm sharing how to make this Triple Tier Card with an optional Stand featuring Tiny Townies on Santa's Lap and a sentiment from the Holiday Sentiments stamp set. 

There are loads of samples of this type of card going around, but my version makes a 5.5" x 5.5" card when closed up, and there is also a gift card holder on the top tier of the card for that extra little surprise.  It is quite bulky so would need to be mailed in a bubble envelope or box envelope, but it's a fantastic display card well worth the extra postage costs. 


Supplies:
Designer paper (used Modascrap: Christmas)
Circle and Scalloped Circle Dies
Pencil and ruler
Scoring board and bone folder
Craft knife

How to:
Stamp Tiny Townies on Santa's Lap onto white card. Stamp the sentiment from Holiday Sentiments onto a piece of designer paper measuring 4.75" x 4.75" - positioning it towards the top. 


Colour the image and fussy cut around the outline using a precision scissors. 
Set the image aside. 


Cut a piece of card measuring 11.5" x 5.5" and score on the long side at 5.5" and 11" (bottom tier)


Cut a piece of card measuring 10.5" x 5" and score on the long side at 5" and 10" (middle tier)


For the panels and sliding mechanism, cut white card:
5-3/8" x 5-3/8"
4-7/8" x 4-7/8" 
0.25" x 7" (x2)

For the top tier of the card cut one piece of card measuring 4.5" x 4.5" 


If you want each tier to have approx 0.5" showing when the card is closed, follow the two steps below. 

Take the bottom tier card piece and, with the 0.5" section on the right, measure down 0.5" on the left side section. Draw a line across. Across the top, place a pencil mark at 1.5" and 4" and draw a line from top to bottom. Measure up 1.5" and draw a line across. 


Take the middle tier card piece and, with the 0.5" section on the right, measure down 0.5" on the left side section. Draw a line across. Across the top, place a pencil mark at 1.25" and 3.75" and draw a line from top to bottom. Measure up 1.5" and draw a line across. 


If you would prefer the tiers to be tucked completely inside each other when the card is closed, move the bottom line down 0.5" on each piece. 


Using a craft knife, cut each side of the pencil line, from the 0.5" horizontal line to the first or second horizontal line, depending on whether you want the tiers hidden. On this sample I went to the bottom line so that the tiers were completely inside one another. 


Take the 0.25" x 7" piece of card and slip in under the centre section. Loosely fold it around and trim if necessary. Glue the ends together. 


Repeat for both piece of card. 


Take the 4-7/8" x 4-7/8" piece of card and apply DS tape around the edges. Fold the middle tier on the 5" score line so that the outside is showing. Apply a strip of DS tape each side of the sliding mechanism. Remove all the tape backing and adhere the panel down. Repeat with the bottom tier, using the 5-3/8" x 5-3/8" piece of card. 


Adhere the paper with the sentiment onto the front of the middle tier and set aside. 


For the top tier, cut a piece of designer paper measuring 4.25" x 4.25" and adhere to the 4.5" square piece of card. If you want to add a gift card holder, measure the size of the gift card and then add 1-1/8" extra to the width, and 0.5" extra to the length. Score on each long side and the bottom at 0.5" 


Using a small circle die, cut a semi-circle from the top of the gift card holder. 


Apply adhesive to the 0.5" sections and adhere the holder down onto the top tier, ensuring it's towards the bottom. 


Apply 1/4" tape, or wet glue, to the sliding mechanism on the middle tier. Push the mechanism right down to the bottom of the runner.


Line the top of the top tier up with the top of the middle tier, centered horizontally across the card, and adhere it to the sliding mechanism. 


Before closing up the middle tier, add a pull tab, or punch a hole and add some twine. 


Apply DS tape to the outside of the 0.5" section and lift the backing on one end. Fold the middle tier over and adhere the 0.5" section to the opposite end, ensuring it's behind the top tier. 


Repeat the steps above to attach the middle tier to the bottom tier. 


Cut layers and panels for the front of the card, and adhere them all together. 


Adhere the circle panel down using foam tape and then adhere the image on top using more foam tape.


Decorate the front as desired. 


Optional Stand.
This card is designed to lay flat but if you want to create a stand to display it upright, cut a piece of card measuring 4.5" x 9.5". Score on the long side at 3.5", 7", 8" and 9". 


Mountain fold the 8" score line and valley fold all of the others. 


Apply adhesive to the outside of the 0.5" section and adhere to the other end. 


Line up the bottom of the stand with the bottom of the back of the card and adhere. 


Decorate each of the tiers using the elements page from the paper pack. 


For more inspiration check out the Stamping Bella Sisterhood page over on Facebook, where you can add your own Stamping Bella creations.

My Social Media Sites